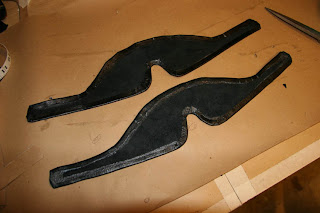
Let's get started with tracing the shape on the leather, and cutting it out.
 Here's our lamb leather. It's nice and soft, and much thinner than the leather we're using for the rest of the f-suit. It has no real strength, and would tear easily if we tried to make the whole suit out of it.
  I'll flop the pattern and trace onto the lamb...
 So, we have our two pieces: one cow and one lamb. I've trimmed our little folding allowance shapes around the edge as you can see below. For now I'm just interested in folding over the edge seam, then we'll glue the two together.
  Here's the glue applied along the edge:
 While we're waiting for the glue to set up I can start cutting our our eye pad shapes from foam. I cut the pattern to make a template so I can trace the desired shape onto the foam with a pen.
  Then I carefully cut out the shapes.
  Here are our two pieces, with the edges carefully folded down.
 I use the same pattern template to trace positioning marks onto the blindfold.
 Then glue is applied, avoiding the areas where the foam will be. Some foams will actually melt if they come in contact with solvent-based glues. It's not a good thing...
 Once the glue has set up, I position the foam pads and place the two pieces of the blindfold together. The lamb is quite stretchy, so it is possible to position it and align it perfectly with the shape underneath.
  This whole piece gets topstitched along the edge, and I also sew around the foam pads. I use the same template to lightly trace the outlines of the foam pads on the surface to act as a guide before sewing. The stitching goes on top of the guideline and keeps it from being visible.
 And there you have it: completed blindfold! Actually, it won't be completely complete until I put holes in the straps, but for this project I am actually sending it to the client first to confirm positioning and fit before I start making holes.
 The view of the inside...
 Just one more thing - the harness gag - coming up next.

Great leather blindfolds making tutorial. I'm planning to make one now.
ReplyDelete