Showing posts with label edge finishing. Show all posts

Saturday, May 13, 2017

Posture Collar Step-by-Step

In response to a request, here's my process for making the locking posture collar with rolled edge. 
I like this design because it fits a wide range of people really well, it isn't too hard to make, and can be produced in pretty much any color and type of leather you like. 
 I start off with 6-7oz. vegetable-tanned leather. Measures about 3.1mm thick. 
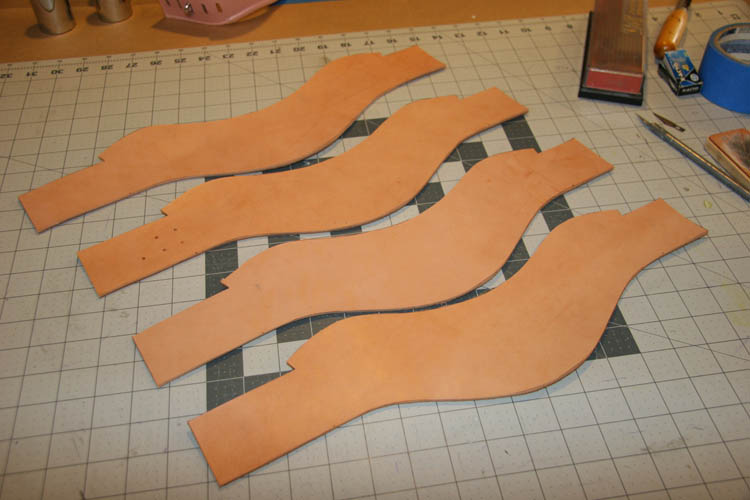
I trace my pattern on the smooth side of the leather. 
 Rough-cut the pieces with my shoemaker's knife.

 At this point I start working the leather over the edge of the workbench to take out the curl. 
I do the final cut out using an X-acto knife. Try to keep the knife vertical. 
 I'll use the diamond sharpener and hone to get the knife razor sharp for these cuts. If you do it right, it'll go through smoothly in one pass. 
 Blank cutout complete: 
Next up, I'll round off the sharp edges with an edge beveler tool. 
 
If your tool is nice and sharp, you'll get smooth, continuous offcuts.

 Edge-bevel complete!
 My next step in edge-finishing is to use 100 grit sandpaper to round those edges. 
 Next, I'll use gum tragacanth and a piece of canvas to burnish the edge. 
 I do have a wood burnishing tool, but to me the canvas is the best way to get the combination of heat and pressure to consolidate the fibers along that cut edge, and get them to lay down. You want the friction to build up, and it turns out nice and smooth. 


 Now I'm ready for the outer leather. I cut this piece a bit oversize, and will trim it after it's glued to the veg-tan blank. 
 Both pieces get brushed with contact cement. 
 Once the glue sets up, these inner and outer layer are stuck together. The excess is trimmed carefully around the edges. 
I use my cylinder-bed (which is set up to sew heavy-weight leather) to topstitch the outer and inner layers together. 

At this point, I'm ready to edge-coat. 
 Now we prepare for the rolled edge. I cut 1.75" strips for the bottom and top rolled edge. About 14" for the top, and 12.625" for the bottom. 
 These all get a bit of glue on their "good" side…
 …as do the collars. 
The edge-strip gets clipped to the collar, good-side to good-side, and stitched a bit more than 1/8" from the edge.  
The bottom strip is clipped and sewn the same way. 

Apply glue for the rolled edge to both the backside of the collar…
 
…and the backside of the edge-strip. 
Once the glue sets up, the rolled edge is folded over towards the back (inside) of the collar.
Then back to the cylinder-bed to top stitch along the front side seam - holding the rolled edge in place. (This is the part that your portable sewing machine will probably not be able to handle.)
The excess rolled-edge in the back can now be trimmed off. 

Sometimes I'll use tape to help me see the position of the holes that need to be punched. These marks are transferred over from the pattern. But you have to be really careful that the tape won't pull up the finish on your leather. Be sure and test first!
I use an oblong punch for the slots:

I use the same method for marking holes for the staple plate, which are riveted into place:
 The front O-ring is secured from the back via screws. 
 And we're done…
 Locking tall posture collar in the color of your choice! Thanks for visiting…


Saturday, August 24, 2013

Edge Finishing and Hand Sewing Leather


I have been working on a project involving edge-finishing and hand-sewing leather, which are two areas of leathercrafting I've been trying to learn more about recently. I've spent a lot of time lurking around on leatherworker.net, which has many answers provided by amateur and professional craftspeople - some with many, many years of experience. I've picked up lots of really helpful tips...

The idea for this design is to add stitched detail around the eye openings on one of my molded hoods. This one didn't turn out too great, so I'm using it to experiment with a bunch of different techniques. The idea was to make the eye openings just little slits, but surrounded by a piece of oblong vegetable-tanned leather. I wanted the stitching to be prominent, so it becomes a part of the design. 


I start off by cutting the oblongs from a 1-inch strap of 6-7 oz. veg-tan leather. 
I use the strap-end cutter to round the ends, and the oblong bag punch to cut the slits inside. It's pretty tough to get the punch through the veg-tan, so I usually end up completing the cut with a hole-punch and x-acto knife.  

 I create a stitching groove with my stitching groover... It's adjustable so you can vary the distance from the edge. Usually you want to be about the thickness of the leather away from the edge - that's a good rule-of-thumb. 
 It's kind of tricky, but I grooved along the inner slot as well, just to create another shadow line. 
 Now I use the edge-beveller to knock the sharp edge off the leather and give it a round shape. 
 The edge-beveller has a groove in the bottom, so it just slides along the edge of your workpiece. 

 Done with the edging...

Now it's time to start finishing the edges. Here are some of the things different people use for edging: Sandpaper, canvas, saddle soap, edge-coat, parafin wax, beeswax, and a wood edge-slicker. I found the edge-slicker on ebay for around $5, including shipping from China! 

 
On these pieces I lightly sanded with the sandpaper, and then used gum-tragacanth on the edges. 
 I buffed the edge with heavy canvas cloth. 
 I laid the piece on my granite surface plate, and rubbed briskly with the canvas. You actually want to generate a bit of heat, and that with the pressure and friction help bind the leather fibers together. 
 It should give you a clean, smooth and shiny edge. 
 Once it was dry, I applied a bit of brown Fiebing's edge kote, using a small brush for inside the opening. 
 I cut the openings for the eye using a hole-punch and x-acto. 

 I actually tried drilling the nose-holes. Wasn't easy - there was no goo support underneath, and I ended up making the holes out of alignment. Good thing this is just a production test! 

I think the bare eye-slits look pretty cool at this point. May have to do a hood like this in the future...

But for this one, I'm sticking with plan "A". 
 I apply some contact cement to the hood and the eye pieces. Even though they are getting stitched in place, it's common practice to use glue to hold things together while sewing. 


For a good primer on hand-sewing technique, this book is the bible: "The Art of Hand Sewing Leather" by Al Stohlman. It takes you through the process in very clear, illustrated step-by-step instructions. 
 It's a bit overwhelming at first, (there are actually 33 steps to his technique), but the steps all make sense, and once you practice a bit, it starts to come naturally. 

One of the challenges of this project is the back side opening is hard to see because it's inside the hood. 
 You have to use the outside needle to guide the inside needle through the hole. 
 Of course, the things I like to do are never easy... Compared to machine sewing, this is almost painfully slow at first. 
 But eventually, you settle down, and get into a rhythm. It's not a race...
 And when it's done, you have every stitch exactly where you want it. 
And it will last for a really long time!
 Thanks for visiting! Until next time...