Showing posts with label Tips and Tricks. Show all posts

Wednesday, July 22, 2015

Leather Thickness Conversion Charts

Have you ever needed to convert leather and found it difficult to get from one measurement type to another? You know, from oz. to fractional inches for example? It happens to me all the time (especially when ordering leather online), so I finally put together a couple of conversion charts for the leather thicknesses I use the most. 

Leather suppliers usually describe their leather in oz. thickness, but the way I measure leather in the workshop is with a pair of digital calipers (which gives me the thickness in mm). These charts allow me to figure out right away that a 2.5 ounce leather will be about 1mm thick. 

There are 2 versions of the chart: one with bands marking the oz. lines, one with bands highlighting the mm. These only cover leather from 1 to 4 mm thick - that's everything from a very lightweight lamb (0.7mm) or pig leather to a very thick bullhide (3.5-4oz.). Of course, many vegetable-tanned leathers can be thicker than 4mm, but I decided to leave that for another chart. Think of these as more for light, medium and heavy-weight garment or chrome-tanned hides that can be sewn with a typical industrial leather sewing machine. 


 PDFs of the mm chart can be downloaded here, the oz chart here. I hope you find them useful!


Monday, December 22, 2014

Prototype Process

The goal: "Perfection". Oh, that's all? 
I didn’t realize until I started making custom gear how much work was involved in achieving a “perfect” fit. (Or at least as close to perfect as I can possibly get...) As I have worked on a lot of project for different people, I’ve spent a lot of time thinking about it, and come to some conclusions…

The first might sound kind of obvious, but it’s huge: Every body is different. 
We come in all shapes and sizes. Well, duh! 

Everyone has a very different body shape, with widely varying sizes and proportions. Just considering the head, the variations between the overall shape of the head and neck, the position of the features on the face, the shape and profile of the nose, chin, brow ridge, lips, ears - there’s a staggering amount of diversity in the shape and size of individual humans. When you are talking about the whole body, the distribution of weight, shape of the shoulders, chest, back, hips, buttocks, the length of the torso, size of the hands, arm-span, length of legs. There is an incredible range. 

Recessed chins and pointy noses are just two of the countless points of differentiation. 

I know most clothing manufacturers use fit models who usually have “ideal” measurements. But how many people actually match these dimensions? There are probably very few who share that exact sizing. But I imagine all their clothes would fit wonderfully. At least all the ones made by that manufacturer using that model! How many women do you know that can always find jeans that fit? It’s an ongoing challenge for most. Based on the complexity of the shape (or should I say variety of shapes) of different women’s hip, thigh, buttock, waist area, I can appreciate the design challenge of making a perfectly fitted pair of jeans. 

A typical “build-to-fit” process for me takes at least five sessions:


First session: Initial measurements and tape wraps
Have the model assume the desired position, and use plastic wrap and duct tape to create a form in the desired shape. The wrapped form is used to create a pattern, which is used to make a test-fit garment in fabric or vinyl. Ideally this test garment is made in a material that closely mimics the weight, thickness and stretchability of the final garment. 


Challenges: This session is usually hot, stick and uncomfortable. Plastic wrap doesn’t breathe so your model can get sweaty, and the duct tape can be kind of smelly. You will get a workout pulling all that tape off of the roll. Plus it can easily take an hour or more to make a sleepsack wrap. It takes patience and time to go through this part of the process. Head wraps can be invaluable for making a fitted hood pattern, although these days I have master patterns that can be modified to fit most heads without going through that trouble. 

Second session: try on prototype, make notes, measurements and edits to workpiece. 
The first actual “try-it-on” fit session, the purpose is to try on the prototype and check for any problems. Is the fit close, but not too tight? Are the seams well placed? Do the openings end up where they belong? No bulges or bumps? Is it comfortable? Is there any part that could be let out or taken in? These questions are all considered, and if necessary a second prototype is made integrating the changes. Typically I use a centered zipper at the test phase, even if the final is going to be laced. The zipper is faster to put in, and will still give me the answer to the question of how the pattern pieces are fitting together. 


Third session. Check edits or try on prototype #2. 
Often when coming up with a completely new design, a 2nd prototype is necessary. This not only helps me zero in on the fit, but to try out different production techniques as well. Some elements might be tricky to sew, but after sewing something a few times, I start to come up with solutions along the way. I try to keep notes including “Next time” suggestions to myself for later reference. You get a lot of “eureka!” moments when making prototypes. 

Fourth session: Try on actual garment. Check for fit, problem solve, trouble-shoot. 
This is the true test of the final design in the final material. All the work from previous sessions and all the time spent in protoyping hopefully pays off at this stage with a beautifully-fitted garment. In the real world, sometimes this is where new problems arise that were not anticipated with the prototypes. Vinyl and fabric can be used to simulate leather, but sometimes the stretch is different, and something that fit perfectly in vinyl is now too tight in leather. Usually, the experience of wearing the leather version is far better for the model than the duct-tape of vinyl version (which may have been sticky, sweaty and smelly). Any necessary edits at this stage are painful, but more notes and additional edits are made to the pattern if necessary. 


Fifth session: The final result.
We’ve gone though all this to get here: a model in a form-fitted restraint that fits every curve, is tight, but soft, comfortable yet confining. We have a pattern that works, with notes and production techniques that deliver consistent high-quality results. All of  this work for a single restraint that fits a single unique individual, with every curve contour and shape beautifully enclosed. Job well done. And on to the next project!

Friday, June 27, 2014

Christopher’s Leather Care Tips

I get asked from time to time about the best way to care for leather gear. Here are a few things I've picked up over the years: 

Leather items can last for decades if properly cared for. Age and use can bring out leather’s natural patina, making it more beautiful. It should fit you better too, as it will stretch to conform to your shape over time. 

Dry dust with a soft cloth or vacuum in crevices inside and out before cleaning or conditioning. 

No, I don't actually have my own branded suede brush!


The inside of your unlined leather item (with suede-like nap) can be brushed and cleaned with a brass-bristle suede brush. Follow up with a vacuum to suck up the little bits of nap that may brush off. 

Lexol Leather Cleaner: the orange bottle.

Use Lexol PH Leather Cleaner to spot clean if necessary before conditioning.

Lexol Leather Conditioner: the brown one.

Use a conditioner like Lexol Leather Conditioner every 6-12 months. Be sure to test it first on a hidden area first to make sure it doesn’t discolor the leather. I like to apply with a soft cloth, then buff with a clean soft cloth and finish with a horse hair brush. 

Horsehair brushes are great for the final buffed finish.


Don’t over condition! You don’t want to clog the pores of the leather, or make it sticky, which can happen if you apply too much or too frequently. 

Note that a conditioner may darken the appearance of the leather. You may want to test a small inconspicuous area first. 

Protect your leather from direct sunlight, which can dry it out and make it fade over time. 

Wipe up spills immediately as they occur with a clean soft cloth.

If necessary, use a lightly moistened soft cloth with lukewarm water to clean a spill. 

Let any damp leather air dry naturally before putting it away. Don’t put it near a heater to speed up drying, as it may result in hardening the leather. 

Do not use soap or heavily soak the leather with water. This may cause more damage than the stain itself.  

Avoid cleaning supplies or soaps, detergents, solvents or bleach. Don’t use furniture polish, oils, varnish, abrasive cleaners or ammonia water. 

Butter and leather don't go together!

Be careful with butter, oil or grease, which can stain leather. Wipe off with a clean cloth, and leave alone. The spot should dissipate after a short period of time. 

Use a chamois to buff out minor surface scratches. 

Store in a cool, dry well-ventilated place, never in a plastic bag! Leather needs to breathe, and can grow mold if kept in a plastic bag. 

A dust-bag can help keep your gear clean, but make sure it’s breathable, natural fiber. 


Avoid strong perfumes or cologne when wearing your leather, as it is porous and will absorb smells quite easily.

Follow these tips, and your leather should give you many years of enjoyment. 

Thursday, May 8, 2014

My 10 Favorite Leathercraft Videos

There are lots of great videos on YouTube about leathercrafting. People are producing and sharing some nicely produced, beautifully shot little movies, and the best of them have an almost hypnotic quality. Watching a craftsperson who has done something hundreds or thousands of times, you see the routines they develop, their personal ways of working. There are many great tips and techniques to be gleaned if you watch closely.

Here are my 10 favorite videos, in no particular order. 

First off, we have JnK from Korea making a camera case for Leica X1 half case in a beautiful red leather:


Interesting glue paddle... Particularly love the way he makes his precision cuts. The position of his hands. The pricking iron. And the steady application of edge coating. 

Number 2: A video slideshow of a Milanese handbag company Valigeria Beretta that has been making luxury items since 1947.

Love the large cutter which I assume they use to slice the boards that would be used inside the bags for structure. Also, it's cool to see all the patterns, cutting templates and tools they have accumulated over the years. The precious exotic skins, which you can see are carefully positioned to maximize yield. 

Next up: A handbag by Salvatore Ferragamo. You know you are in the luxury space when the craftsperson is wearing a lab coat. I love the way the video starts with him feeling the leather for any flaws or defects with his hands. You may be able to detect with your fingers something you can't see with your eyes...


At 0:55 he puts the leather through a skiver, which takes the hide down to a specified thickness. Nice way to get consistency, but those things aren't cheap! At 1:05 he's skiving down the edge with another machine, which tapers the thickness just along the edge. It has a circular, bell-shaped blade (which you can't see in the video). At about 1:07 you see him sanding the edge with a power sanding wheel. It's great to see all the steps involved in building up the handle (starting around 1:30). See how he's working on a nice, thick marble slab? At 3:11 using shears to cut relief slits for folding the leather around the curves of the handle. Then using his bone folder to crease, coax and fold the leather into place. At 3:26 there's a telling detail. When mating the sides to the bottom, our craftswoman aligns the center point, and then the corner point, before working down the leather in between. A perfect strategy for maintaining the shape when joining two pieces with elastic properties, such as leather. Note the use of an edge guide at 3:47 when machine stitching. At 4:07 the "bag-within-a-bag" construction technique comes into play - a great strategy for creating an inner lining. 

Now for a pair of sexy red patent leather heels, another video by Salvatore Ferragamo:


This one starts with the digital sketch, rotating in a 3-dimensional rendering. Then they skip directly to a pattern being projected onto the leather on an automated cutting table. These things run over $100,000! Not for your average shoemaker... At 0:27 they are skiving the edge, thinning it down. At 0:35 you see the very careful and close-to-the-edge stitching along the upper opening, mating the lining and using a post-bed sewing machine with a wheel instead of a presser foot. Just look at how close to the edge that stitching is...

Next the counter and toe reinforcements go in place, before the workpiece is clamped into what looks like a Darth-Vader-like torture/stretching machine. That thing is putting immense pressure on the leather to stretch it into shape around the last. Even with all the specialized machines, notice all the hand work still involved, every step of the way. Notice the lining is kept oversized, so it can be nailed to the last? A way to stretch the workpiece without making holes in the finished shoe. 

Into another machine that helps form the heel of the shoe, pulling the leather ever more tightly over the shape of the rear of the foot. 

At 1:40, I'm assuming that the trip on the conveyor-belt is through some sort of oven. Many heat-set adhesives are used in shoe making these days, and that may be the part of the process where those glues are activated. 2:05 using a grinding wheel to taper down the leather at the bottom of the shoe. 2:44 the sole is lovingly hand-glued in position. 3:00 a specialized press, to make sure the sole is firmly attached. 3:18 those nails from earlier are removed, and the shoe is freed from its last. 3:35 I think this device is nailing the heel to the shoe. 3:46 edge coating the shoe opening. 3:54 hot foil-stamping the logo onto the insole. 

Video 5: Some classic hand stitching from Hermes.


This video is a great primer for those of you interested in hand stitching with 2 needles. All the steps are shown (except for the inital hole-punching, unfortunately). You see the stitching pony, waxing the thread, putting the needle through the thread. Watch closely to see how he uses the thread from the first stitch to help pull the needle from the second stitch through the hole. Notice how he uses the awl to guide his needle though for the first stitch. Observe how small the stitching awl handle is (and how well it fits in his hand). Also notice how short the blade is on his awl. No wiggling when he punches through the leather either, his holes are nice and tight. Probably a nice sharp edge on his awl. Flattens the stitching at the end with a mallet. Look at the beautiful finished stitches when he's done. Just look at them, and learn! 

And number 6: Some gratuitous handbag porn from Gucci. 


Love the hand-airbrushing at the 0:27 mark. This one jumps all over, showing a variety of techniques very quickly. Hand-cut fringe at 0:57 which become those awesome tassels. Note the use of the custom wood form during assembly (at 1:24). Hand stitching to reinforce the corners at 1:39. Using heat to from the bamboo handles at 1:52. Slow stitching of the nameplate on a cylinder-bed machine 2:02. 

A document case by Dunhill:


Not as detailed or as informative as some of the other videos, but still fun to see a master at his craft... Not sure if the whole thing is hand-stitched (they only show him stitching the handle), but it is quite possible. 

Video number 8: a craftsman from Hermes talks about the process of making a Kelley bag. Originally from NY Mag's the Cut. 


Video number 9: the making of a Louis Vuitton bag with embossed monogram:

Starts with feeling up the leather (as in several other videos), and at 0:25 one of the cooler things to see: the giant embossing plate that presses the logo monogram design into the leather using a giant press. How cool is that? This video skips all the making, and jumps right to the sanding (0:36) and edge-painting (0:43-0:50) which is accomplished through a unique machine. The last part of this video seems to be all about inspecting the final product, measuring stitches, and looking for blemishes or defects of any kind. 

And last but not least, number 10: a quick video of hand-made high heels by Koronya shoemaking school:


I hope you find something inspiring or helpful in these, as I have. 

Wednesday, April 16, 2014

Fetishcraft book by John Huxley

I recently received a beautiful book by John Huxley titled: Fetishcraft. It's the best book of its type that I've ever seen: a great primer on making your own custom fetish gear in leather. 

Mr. Huxley starts out talking about the tools you will need for production, and if you've been reading this blog for a while much of this will look familiar. I agree wholeheartedly with his statement: "When the fit should be precise, as is generally the case with fetishwear, making ones own garments is ideal."
I really like that it's more than just a how-to manual. The chapters begin with the author discussing different aspects of fetishism and the BD/SM sexual experience - almost a philosophical overview that frames the projects.  

Production processes and techniques are spelled out clearly. The level of detail and the variety of projects makes this book a treasure trove of information. 


Each project comes with a measured drawing, into which you can plug your own measurements for a custom-fit. Some unusual garments are covered, such as robes...
...and even zentai suits made of spandex. 

There are patterns and tips for making bondage-style hoods in leather. 

(I always love seeing how different people approach the problem of making a tight-fitting leather envelope for the human head out of what is essentially a flat material.) Many of the projects covered in the book could be adapted for latex construction as well. 
Lots of creative ideas to get your mind going when it comes to customizing your designs to make them truly your own. 
Some of the projects are more simple, like the fist mitts,
a ball gag, 
harnesses, 
and a cock sheath! 
There are some pretty complex projects here as well, including a very thorough description for making weighted, plaited floggers - from cutting the strips of leather you'll need, to the turks-head knot used to finish the end of the handle. 
  
Overall, I'd highly recommend this book for anyone interested in leathercraft, making their own gear, or even making things for others. It's detailed, thorough and organized, offers a comprehensive overview of tools, equipment and techniques. 

Available at Amazon, or check out the book's website here. 

Tuesday, November 5, 2013

13 Workshop Tips & Tricks

A collection of 13 tips and tricks I’ve found helpful around the workshop. 


Another tip I found on leather craft forums is to use super glue to lock the thread ends in place - a technique that could be used for machine or hand stitching. You would just have to be very careful not to get any glue on the front side of the workpiece. 

The main reason I purchased an anvil was to have a firm curved shape I could use to help shape and flatten the seam allowance on hoods - particularly around the nose and chin areas. 
The horn on this 24lb. anvil is just the perfect shape for this type of work. 


The face (the flat part on top) is also great for setting the stud and post (flat) side of your snaps. A useful thing to have for about $25!  I got mine here.


I use double-sided tape to hold the zipper in position while sewing. If this was cloth, you could machine-baste but that doesn't work on leather - because it would leave holes behind. I used to use masking or blue painter’s tape for this, but have found the double-sided sewing tape works even better for a couple of reasons: It’s less wide than the other two, and easier to remove when you’re done sewing. 


Make thread changes quick and easy:


I have to credit the technicians at Artisan who shared this tip with me. It saves a little bit of time each time I swap out thread colors. 

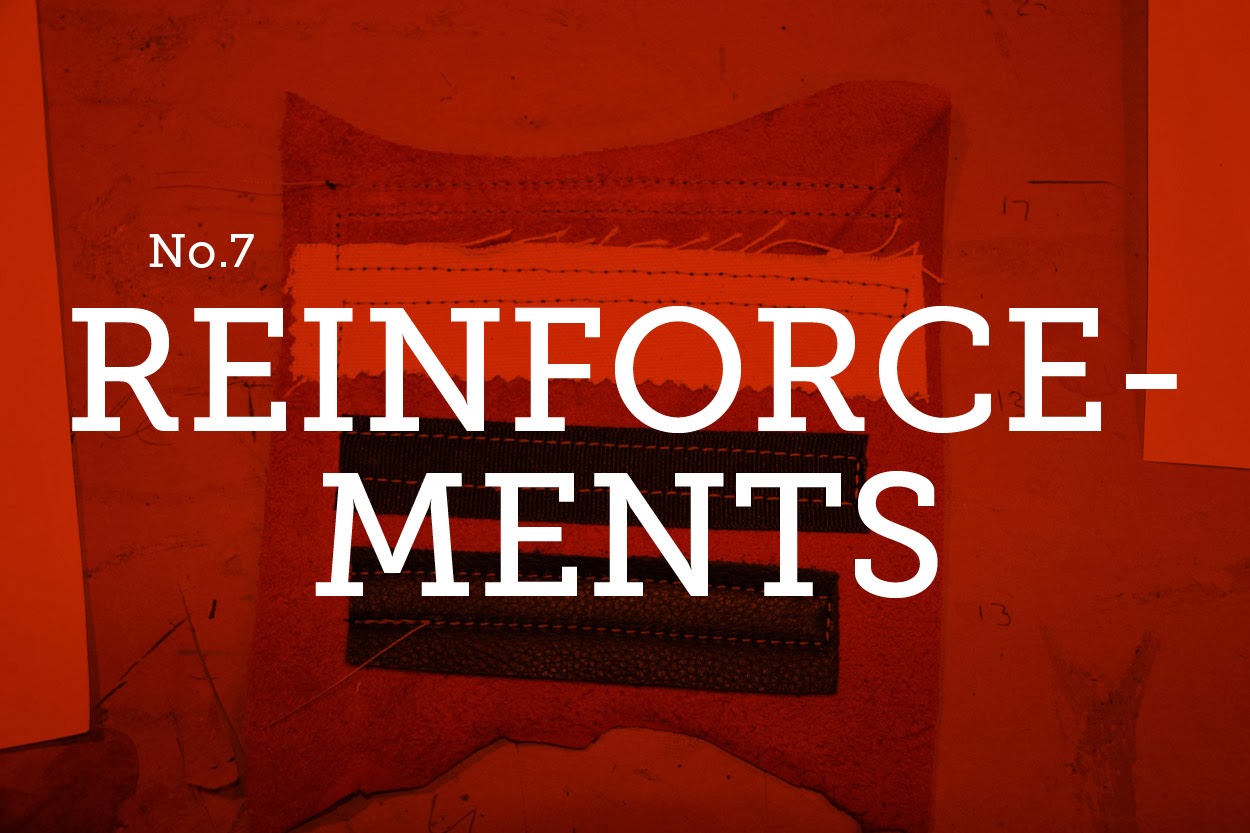
Sometimes you want to strengthen an area, and there are different ways of approaching that depending on where you are working and the kind of seam you want to leave behind. Shown
below are four levels of reinforcement:


Everything starts out fine when you first open your new can of glue. It’s all smooth and just the right consistency - not too think, not too thin. It just flows out of the brush. 

After a while, the glue in your pot will get thicker as the air inside takes up more space when you close the can, drying out over time. I try to keep this thickened (but still usable) glue for use on straps or thicker pieces, where the spread-ability isn’t an issue and application of the glue doesn’t have to be as precise. 


You should also keep a couple of disposable brushes around for spreading glue - in 1 to 3-inch sizes. Even though this glue is supposed to be soap and water clean-up-able, I usually only get a few uses out of a brush before the glue dries in the brush and renders it unusable. 


I came up with a simple way to help hold layers in alignment when setting rivets: just use nails! It really helps hold the layers in place, as they can shift around easily when handling the workpiece and placing it in the bench riveter. 

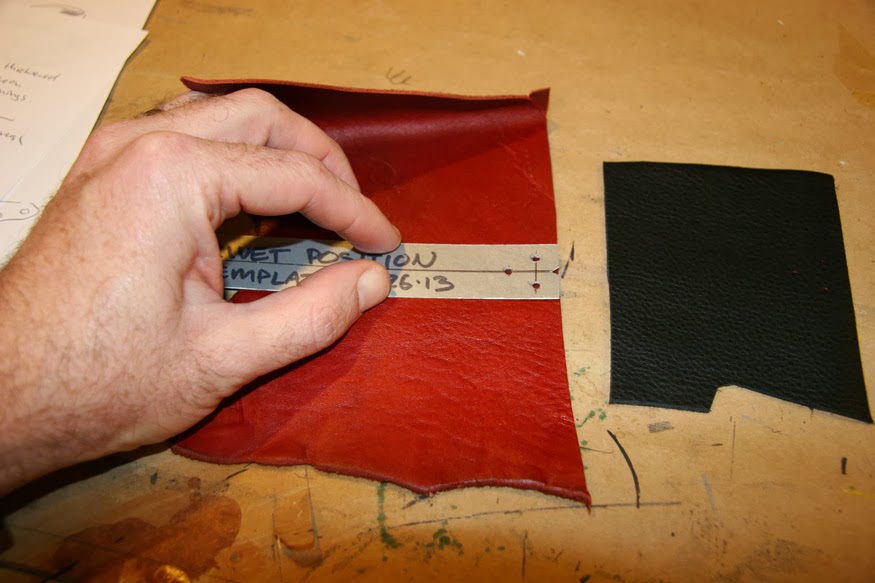
 Mark hole locations in both workpieces with a template.
 Punch holes in both pieces. 
 Align pieces and insert nails in "unused" holes (the one that won't be receiving the rivet).


And hold everything together tightly while setting the rivet. 


Make a clear envelope to hold your smaller templates and patterns. 
This heavy clear vinyl is only $4.75 per yard at the fabric store. It's a great way to keep your small templates organized and easy to find. 


I found these at the local art supply store for 95¢ each. They keep little parts organized and at hand while you’re working with them, and stack neatly when not in use. Great for 4-part snaps, and 2-part grommets - all those little parts that like to roll off the workbench. When you're done, it's easy enough to empty the parts back into their boxes for storage. 


Use wine corks to protect your awl points!


I got the idea from watching the video of JnK making a camera case below: (Worth checking out for the precision craftsmanship!)


These are fun to make out of scrap veg-tan leather and are rather useful for quick reference. They can help you determine the right size hole punch, bag punch or grommet needed for a particular project. I usually punch at least one large hole so they can be hung up out of the way. This one came out nice:
In the case of the boot hooks below, you can have examples of the different types of finishes that are available on the hardware. Some of the different finishes can be kind of subtle. 
A stitch-length sample can help as well, since at least on my machines the numbers don't seem to correspond to anything at all. The only truism is: larger number on the dial equals longer stitches, but after that, all bets are off. The only sure way to know how the stitch is going to look is to run a test. 
Hope you found something useful here - these are little things that I use almost every day in the workshop! Until next time...