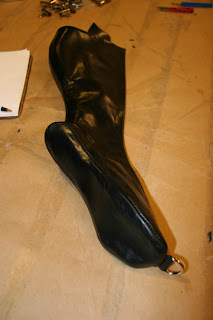
So, after all that work, the refinements and tweaks, 3 prototypes and hours of sewing, gluing and grommeting we have the final result:
 Yes, they came out really hot! They fit so beautifully all the way up the leg, I'm really happy. The leather is nice and smooth and shiny - just the right weight, just the right balance between thickness and stretchiness.
 I eventually want to make a pair of actual (walkable) boots, and I see these a first step in that direction. Obviously these lack heels and any kind of internal support structure, like a toe box or counter, but they could actually have those elements and become a hybrid leg covering.
 These are more like close-fitting gloves for the feet. And if you love leather and feet as much as I do, that's a beautiful thing...
 As with a lot of my projects, once I get to being happy with the pattern, I start to think of all the possible variations; make them in red patent, or with contrasting color on the sole... or thigh-high, or with integrated straps - maybe they could strap together? The possibilities are only limited by your imagination. And your leather budget, I suppose...
 Until next time...
 The set includes an open-face hood...
 ...made-to-measure bondage cuffs (for wrists and ankles)...
 ...bondage booties (from the newly-developed pattern)...
 ...bondage mittens...
 ...and a beautiful waist-cincher:
 I'm really looking forward to seeing these on a model!


