Monday, January 7, 2013

Black Cherries F-suit beauty shots

I wanted to share some images from a couple of shoots I did with the F-suit I made for the upcoming show at Vanilla Gallery Tokyo, a project I've been working on with Karen Hsiao - her "Black Cherries" series! 

This F-suit is going over there, and it might be sold - so I wanted to take some nice photos of it just in case I never see it again...

This is probably the most severe, tight-fitting f-suit I've created to date. The legs are positioned so the person inside is pretty much forced into a face-down hogtie. The leg pockets pull the lower leg close, and the torso fits very snug as well. The only relief is in the arm pockets, which are actually the smallest version of the pattern I typically use. The zipped hood also fits pretty close, especially for such heavy, unyielding leather. This is an extreme suit to wear!


You can see from the shot below the tight fit of the torso at the shoulders, and the way the hood and body zippers meet in the middle. This is as close to a glove-tight fit as you are going to get. 


I was hoping you would be able to turn your head inside the suit, but because of the heavy weight of the leather it wasn't really possible. I had to prop my model up on a pillow to allow her to breathe. This design is actually meant to be used in conjunction with a suspension harness, but that part is going to have to wait for another time. For now, the suit can be displayed suspended from the built-in D-rings, just not with someone inside!


I positioned the zipper on the outside of the leg pocket to make getting into the f-suit easier. You step through the pocket, then bend the knee and pull the zip up to get in. I love the way it looks from this angle.


The bean-bag helps get my model off the floor. This is more the position I could see with the suspension harness...


For those of you wondering if there was a real girl in the suit, here's a picture before she got inside:

Looks a lot better with her in it, don't you think?

Saturday, January 5, 2013

F-suit Poster for the Karen Hsiao Vanilla Gallery show

I managed to take some photos and put together a poster for the upcoming show at Vanilla Gallery in Tokyo (see below). It's been so awesome to work with Karen Hsiao on her Black Cherries series, and I'm really looking forward to everyone being able to see the whole set...  It's been a lot of hard work, but very rewarding as well. I wish I could be there for the opening! 


F-suit for Vanilla Gallery - Final Assembly

Final assembly goes like this: Clip the legs in place and sew. 

Those marks indication which seam goes where come in real handy at this point. You are working with pieces turned inside out, and it's very easy to get them mixed up. Align 1 with 1 and 2 with 2. Simple is good. 


Legs complete...


...and looking good. Man, this is going to be one tight fit.


Next for the arms. I align the top panel to the center of the shoulder seam - another thing it's good to mark from the pattern at an earlier stage. 


Arms and legs attached...


Next up is the hood. Aligned on the center seam...

 ...clip the hood in place, and sew like the others. 


With all the limbs and hood attached, it's time to glue and flatten all of those seams. See you in an hour or two...


OK, now we move on to the final seam - the opening from the neck through the crotch. 


This all gets glued down carefully. You want to follow your pattern line and keep these the same length as much as possible, otherwise the zipper will never align correctly. 


With the zipper in place we're almost done... 


I didn't take a picture of this step, but I cut a tongue to run the entire length of the second zipper. This is sewn in place through the opening. 


And we're done!


Another one for the history books...


Now, where'd my fit model run off too? Honey, got a second? I need you to try something on for me...

Friday, January 4, 2013

F-Suit for Vanilla Gallery - A Zipped Hood

This was my first attempt at a hood for the Vanilla Gallery/Karen Hsiao Black Cherries project. It came out well enough from the front...


...but I didn't care for the amount of puckering I was getting at the rear along the zipper. It was caused because when I extend the rear panels to meet in the back, they pretty much became too long for the distance they had to cover from the top of the head to the base of the neck. The only way I could think to fix the problem was to split the rear panel into 2 parts. I knew if I made the seam where those 2 parts come together curved, it will help shorten the length and make the curved shape needed to conform to the back of the head. 

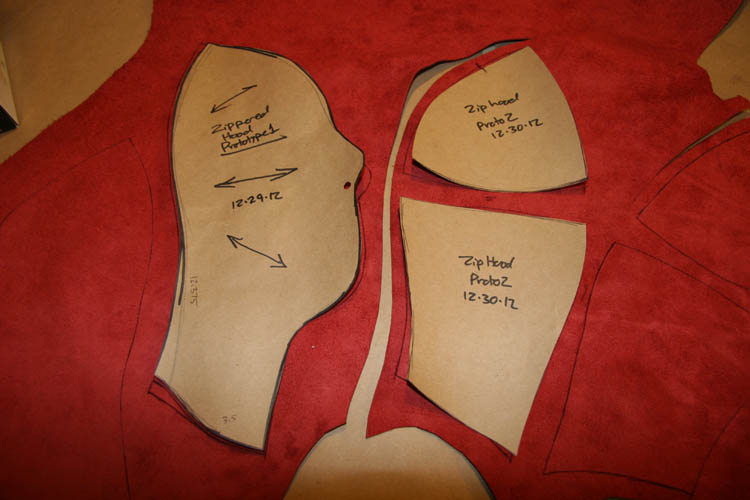
 So here is the pattern for version 2. As you can see, the rear panel is split into two parts. 
 Here are all the pieces for the hood cut out. 
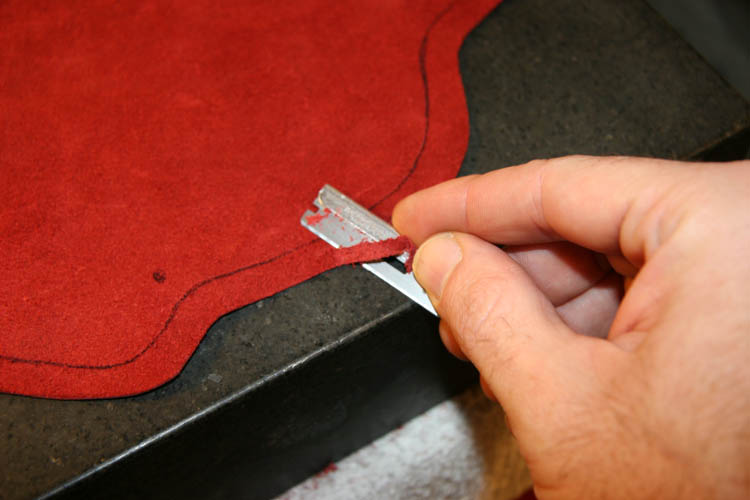
 Every piece for the hood gets skived, in this case for comfort as well as looks. It helps the seams lay perfectly smooth on the inside of the hood. 
 First sewing steps: the front of the hood, and the top and bottom left and right rear panels are clipped together for sewing. 
 Sewing complete:
 At this point I glued the rear panel seams. Folding them down, they start to take a nice curved shape right away - always a good sign. These also get sewn together where they meet at the top. 
 Now I glue the rear panel opening and top rear seam. 
 The front of the hood, seam glued and flattened. 

I'm ready to set the zipper in place. I'm using my new method of separating the zipper and sewing one side in at a time without any clips or tape to hold the zipper in place. 


The key to getting this to work is leaving enough extra zipper for two things. First, to make sure you can trim them so the ends are close to even when you are done sewing, so they line up when you put on the slider. 


And second, you want enough room to place the slider on the zipper and get it going a little way...

 ...with enough room to tuck it under and pull it through to the right side. If you cut it too short, this can be tricky.

When you get it right, it comes through nicely on the other side. 


Now it's time for the tongue. A 1.75 x 12-inch strip. 


This gets topstitched in place. 


Now it's time to join the front half to the rear. Align on the center seam...


...and don't forget the 7th D-ring at the top of the hood!


Sewing complete. 


Ready to glue and flatten the side seams. 


And we're done! 


Nice, strong D-ring on top. Seams look nice and centered... 


...and the problem of the severe puckers has gone away along the rear zip. Looks much, much better! 


I actually made two more versions of this hood, in addition to the two above. This one (version 3) ended up being too tight. The heavier leather usually means you need to size more generously as it will stretch much less than a lighter weight. In my attempt to up the size, my third version was too large, and had a bit of a bump at the forehead. It's sometimes hard to predict what changing just part of a curve will do to the final piece. The fourth and final version that gets attached to the f-suit was just right - in between the version 2 and 3 sizes. I ended up with an open mouth as well, in order to make the suit a bit easier for my poor model to endure!