I'm still busy working on some new pieces for Karen Hsiao, the super-talented artist and photographer I am current collaborating with.
The latest project for her is a pair of light tan colored hoods - one mouth-only, and one open-face. The color of the leather takes on an almost flesh-tone appearance if the lighting is right. My wife said "creepy" when she saw it... I think that was the desired effect!  I love working with the lamb leather, as it is perfect for hoods: soft and stretchy, so it will conform to the wearer's face. The photos don't do this one justice - it's one sexy hood.
 I have fine-tuned the pattern so that it completely matches the hood last I have carved. This makes a couple of production techniques easier, which I plan to share with you on an upcoming post.
 I also have been experimenting with a different method for the tongue and lacing panel in the rear of the hood. My previous pattern had a one-piece tongue that was sewn all around. The problem was, to make the opening large enough to get your head in, the tongue had to be quite large. And large could mean bulky.
This new approach uses more of a half-tongue, which reduces the bulk. It also allows me to open the hood wide to topstitch the side seams, even after the back and front panels are sewn together. I use a mini-tongue on the other side to prevent hair from being pulled through the grommet holes as they laces are drawn tight. Don't worry, I'll explain it more clearly later!
I also have been experimenting with a different method for the tongue and lacing panel in the rear of the hood. My previous pattern had a one-piece tongue that was sewn all around. The problem was, to make the opening large enough to get your head in, the tongue had to be quite large. And large could mean bulky.
This new approach uses more of a half-tongue, which reduces the bulk. It also allows me to open the hood wide to topstitch the side seams, even after the back and front panels are sewn together. I use a mini-tongue on the other side to prevent hair from being pulled through the grommet holes as they laces are drawn tight. Don't worry, I'll explain it more clearly later!
 I'll post new patterns, too.
 For now, I'm off to bed...
The inspiration for this project is a pair of boots from Prada's Miu-Miu line from a few years ago - they were something I came across on eBay, at a price I couldn't pass up. They were stunning, black patent, lined in white leather. What can I say, it's a weakness. Plus, as I always say: "My wife can never have too many pairs of boots." The contrasting white stitching against the black patent leather just pops - so graphic and bold.
  Since I saw them I have wanted to make a sleepsack with the same contrasting topstitching.
  Normally I work only in leather, but for this project I'm experimenting with a vinyl I found at Michael Levine's in downtown LA's garment district. They have a couple of stores, one for garment fabric, and one with upholstery fabric and findings across the street. This vinyl was about $15 per linear yard - so it's much cheaper than leather.
  Usually the stock upholstery vinyl is just so-so, but this stuff was incredibly shiny and glossy - it looks like well-polished, shiny rubber. It's very sexy.
  Most upholstery vinyls are too stiff as well, but this stuff was so stretchy and pliable - but not too thin. I just had to try it out.
  It's sort of a prototype/experiment at this point. I am able to use my new hood last to stretch and shape the vinyl. I recently found out that some vinyls take to heat-forming - so that's something else I am looking into playing with. The problems are: it's not breathable at all (as leather would be). It doesn't take to glue, so making the seam allowances behave is a problem. I'm also not sure how durable it will be.
  This is going to be a complete enclosure sleepsack - no access holes anywhere. Just a sleek, shiny frustrating enclosure. At the very least, this thing is going to look great in photos.
  In progress...
 More to come...
I have a current client that was able to provide me with a duct-tape wrap to use as a pattern for making his sleepsack. I was glad to work with this, as there are so many unique body shapes out there - this is one way to get hundreds of measurements without actually having to take hundreds of measurements...Of course, not all wraps are created equal, and ideally I would be able to make the wrap myself, but in this case I felt it could still be of some use. It was of stiff tape (there are different kinds of duct-tape out there, and I think the cheaper, thinner tape can sometimes make a more close-fitting wrap). Also, it was only one layer over cling-wrap in most areas - enough to hold it together, but not exactly smooth-contoured, as you would get with 2 or three layers. Still, there was lots of great information contained within the wrap, so I was happy to have it.  My first step is to straighten and even out the wrap as much as possible, taping the shape closed. I then mark lines corresponding to the shapes of my master pattern. Basically, I look for the centerline from both the front and sides - so the 4 pieces are roughly equal in dimension. Next, I cut out the shoulders, again referring to my master pattern for guidance on the shape. Usually I will take the first one cut out, and use it as a rough guide for the second shoulder.
  On a clean sheet of butcher paper, I have traced the master pattern in pencil first. Then I lay the duct-tape cutout shapes on top and trace the outlines - first one side, then the other.
  I usually use the neck opening as the starting point - it helps to have a common reference point between the three shapes.
  Here you can see the black pencil, showing the master pattern, and the green and orange outlines for the duct-tape pattern. I knew the height of my client was a couple inches taller than the master pattern, so I was glad to see this came through in his wrap.
  The same idea for the shoulder. I know the overall shape of my master pattern will work, it is just a matter of integrating the size differences without compromising the shape.
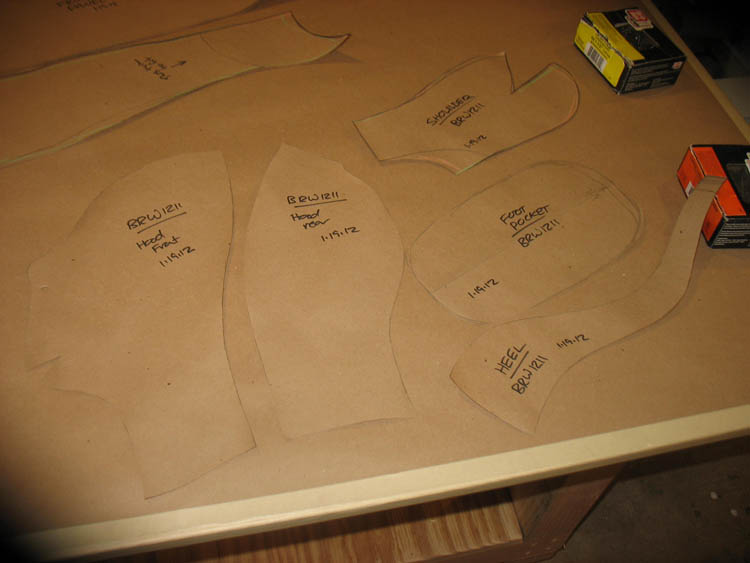
  Now all the pattern pieces have been re-drawn with the new sizes, and the shapes are cut out. Here we have the hood, shoulder, foot pocket bottom and side...
 ...and the large panels for the front and rear of the sleepsack.
  At this stage, I want to proof the pattern before making the final in leather. It's better to catch any mistakes or problems in the pattern now, as it will be a much more expensive proposition later. I just finished reading a great book on custom shoemaking, and was suprised to find that they make test-fit shoes as well - to proof both the last and the pattern. Our test will be in vinyl, and should give us a good idea of the overall fit.
  Here we have all the pieces cut out, and ready for sewing.
  A few hours later, and we have the prototype ready to send off to the client. Since I have already covered the process of making a sleepsack on this blog, I won't go into all the details again here.
  It is a lot of work to go through just for a prototype, but it will be worth it to know that the pattern is good, and that the leather final version will fit like a glove.
 Until next time, take care...
I just had to share this really nice set of images by Captive Kink of a lovely young lady in a beautiful butterfly straitjacket. Not one that I made, but it looks very well-done. The link to the full set of images is here. There is even a video of her wiggling around in this hogtie position, with her hood chained to her legs - the poor thing. She's not going anywhere! 
Another cool shot courtesy of Karen Hsiao, this time of a beautiful Asian model wearing the f-suit squatting on that incredible chair. I'm so loving this series... just stunning!

I wrapped up the lasts for the ballet boot project I was working on, and wanted to share a couple of pictures of the final steps. Actually, I have more to do on these to fine-tune the fit, but I have to set these aside for now, as I have other projects pending. I ended up taking the left foot shape almost to completion, and then I had to play catch-up with the right. As I got closer to being finished, the final shaping around the instep and heel really made the last look like a foot. I wanted a tight, anatomically correct fit, but also didn't want the final shape to be too literal - I still want a sleek, stylized form as well.  You can see by the image below how much wood had to be removed to get the final shape.
  From the front, the last took on an even straighter shape.
  Below are images of the final form (for now, at least)...
 I am really looking forward to making a pair of boots from these, but it will have to wait for now.
  Stay tuned for more...
 Until next time...

 I love working with the lamb leather, as it is perfect for hoods: soft and stretchy, so it will conform to the wearer's face. The photos don't do this one justice - it's one sexy hood.
  I have fine-tuned the pattern so that it completely matches the hood last I have carved. This makes a couple of production techniques easier, which I plan to share with you on an upcoming post.
  I also have been experimenting with a different method for the tongue and lacing panel in the rear of the hood. My previous pattern had a one-piece tongue that was sewn all around. The problem was, to make the opening large enough to get your head in, the tongue had to be quite large. And large could mean bulky.
  I'll post new patterns, too.
  For now, I'm off to bed...