Tuesday, July 21, 2015

Balled-up Restraint Design Sketches

I've started working in earnest on the balled-up restraint, project number 3 from my "Top 10" list of last year.  This promises to be a good challenge, getting the fit just right for what is a pretty complex shape, in a crouched, balled-up position. I've already created a wrap from my model, and am figuring out exactly how this restraint is going to work. 

 I keep debating how I want to tackle the arms. Initially, I was going to go with long strait-jacket-style sleeves which would buckle behind her back. But the idea of laying on top of the buckle if my model was lying on her back didn't seem like a good solution. I definitely want to use this sack in that position, with her toe D-ring chained to the ceiling. 
I was toying with the idea of having the sleeve be continuous, with a zipper to lock the arms in position. They would form a permanent loop. I'm just not sure if that's going to give my model enough room to get in and out. But, it would be very clean looking. 
As it is now, this is going to take 2 zippers for entry. One in the rear from the top of the hood, down the back and through the crotch to the rear of the knees. The second zipper would be in the front, from the knees to the toes, securing the lower legs and feet tightly in the foot pocket. 


I'm posting an old drawing from 1998, just to show how long this idea has been kicking around in my head. Obviously there are many differences in the details and specifics, but the general idea is the same: a balled-up straitjacket/sleepsack type of design. 

By the way, I wanted to send thanks to everyone who has contacted me with support and encouragement for the ongoing "Top 10" projects. It's great to know there are people out there who actually enjoy following along and seeing the ideas brought to life. It does make a difference, and means a lot to me. 

Wednesday, July 15, 2015

Prehistoric f-suit stone carving

A few years ago someone sent me these fantastic images of a figure carved in stone from a prehistoric site located somewhere either in the UK or Europe. These are actually replica souvenir trinkets available for sale. Unfortunately I managed to lose the specific information, and am left only with the images, which I have to admit, do bear a striking resemblance to the f-suit design. 

 I love the idea that certain forms have timeless, universal appeal, and these stylized figures have a fecund voluptuousness that comes across quite clearly. Perhaps this was some sort of fertility idol? 
 The red-dipped and shiny glazed versions have an added visual flair. 
 If anyone out there recognizes the images or may know any information about the figure, could you please contact me? 
 I would love to order some of these...
You can either leave a comment (I won't publish it), or email me directly at christopherfetish{a}gmail.com. 

cat in the kneeling posture suit

The amazing cat at her master's (-EM-'s) feet in one of my kneeling restraints. This was just a quick cellphone pic, shared by cat on her fetlife gallery.  I love these two... what a couple! 

Apparently she was kept in there for about an hour. Even managed to fall asleep. It always makes me happy to know the gear I make is being put to good use. 

Tuesday, July 14, 2015

Fist Mitts Test Fit Gallery

So these turned out pretty nice. 
I'm happy with the fit, after tweaking the pattern from the first go-round. The test mitten in lamb wasn't tight enough, and could actually be slid off. Unacceptable! It was probably the stretch inherent in this leather that allowed that to happen. You actually may have to make something slightly undersized to get it to fit just right in your desired leather. It's the opposite of "ease" in garment making. 
I decided to put the zipper on the back of the hand, and  I love the clean look of the inside. Now I really want to do a pair with lacing instead of a zip-closure. 
 
The fitted, bulbous shape at the end is surreal-looking. Very stumpy. In a good way...
I am actually going to have to make a pair of cuffs just for these, as the tight ones I usually use are a bit too big. Ahh, the problems I make for myself...

Wednesday, July 8, 2015

Bondage Fist Mitts - Let's make a pair!

For a long time, I've wanted to make a pair of super-tight fitting bondage fist mitts. 

I've always thought boxing gloves had their own special appeal. Something about the way they render the subs' fingers useless, making them even more helpless. Especially when combined with additional bondage. These are going to be a sleeker version than a boxing glove, a more couture take in soft black lamb leather, with a zipper for quick on-and-off. Did I mention they'd be really tight? 

I start with a careful, fitted wrap. Duct tape over plastic wrap. 

 Sketch some keylines with a sharpie to define the pattern shapes. I'm looking for natural plane breaks, and trying to make pleasing, not-too-hard-to-sew shapes. Smooth out those curves.
 I put a piece of string under a strip of masking tape to create a kind of quick-release tab. Once the wrap is done, just pull the string to let your model out. This gets taped back up before cutting the pattern apart.
 Initially I have four parts:
 Two sides, and a top and a bottom piece. I like the way the sides are...
 ...but the piece for the top has a very pronounced cupped shape. (Shown below in an out-of-order image.) That was not going to lay flat as it was.
 So I split that top piece into 2 parts, giving me two hockey-stick shaped pieces. 5 pieces total for the pattern. 
 These all get transferred to card and cleaned up.
 And finally cut out, ready to transfer to the leather.
 It's a soft black Italian lamb measuring about 0.7mm thick.
 I transfer the pattern with a pen - nice, precise marks.
 These get cut out with about a 1/4" seam allowance. I keep it minimal on this thin leather.
 I clip what will be the zipped top panel first. This gets sewn only at the two ends (leaving room for the zipper in the middle).
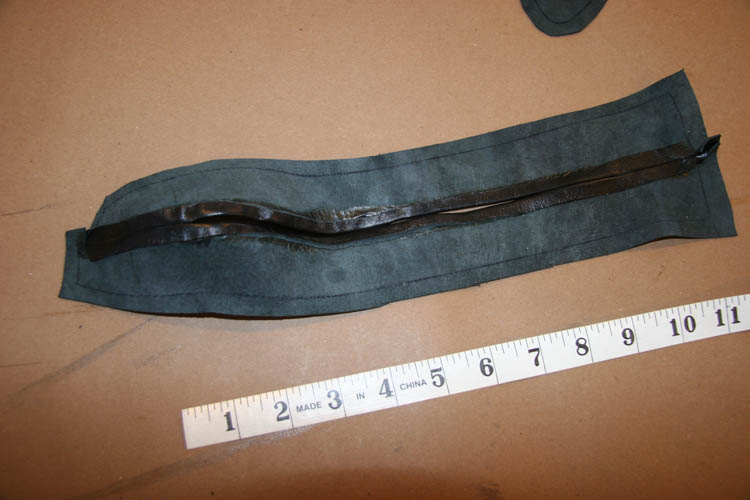
 The whole seam gets glued down, prepared for the zipper to be sewn in.
 Lately I've been using double-sided tape to hold the zipper in place before sewing. It allows very precise placement, and keeps things from moving around at all while going through the machine.
 Get everything lined up... stick it in place with the tape...
 ...and carefully topstitch.
 Instead of backtracking on this delicate leather, I usually trim the threads long and tie them from the backside.
 Trim the zipper to length.
 Prep the tongue with double-sided tape.
 Position the tongue, and topstitch in place.
 This gives you a second line of topstitching on the tongue side.
 You can trim the tongue down if needed.
 Clip the bottom strip to the top where they meet, and sew that together. Glue and flatten that seam.
 Now, we're ready to sew on the sides. These get clipped in place and sewn.
 I find it best to sew the "shape" and let the strip follow along. So I'm looking at the line for the side panel when sewing these together, and letting the "top and bottom" panel follow along from below. (Hope that makes sense.)
 One side down... time for the other.
 Same deal as before: Clip...
 ...and sew, following the line on the side panel.
At this point, I use a 1 by 2 secured to the workbench to hold the workpiece in place. 
There's a bit of foam at the tip to help the hand pocket retain its shape. 
It gives me something to push against as I glue and flatten the seams. 
I just brush contact cement on the seam allowance, and flatten the seams all around. 
Turned right-side out, I'm pretty happy with the shape. 


The bottom edge gets glued and topstitched as well. 
And our mittens are done. Ready for the test-fit session.