A few weeks ago I caught an old movie starring Audrey Hepburn and Cary Grant on Netflix called Charade. It wasn't bad, kind of a mystery/comedy/romance sort of vibe straight from the 1950s - even though it was made in 1963.
 One thing that stood out to me was all the long leather gloves Audrey Hepburn wore throughout the movie. They were just beautiful, tight-fitting. And really long!
 I would recommend a watch if you are a fan of long gloves. Hopefully Netflix will upload a cleaner version of the movie in the future, as the sound and image on the one they stream is pretty darn crappy. But, even so, the gloves still shine!
It is really a great time to be alive as a person with a thing for boots. There is so much creativity in the field of shoe and boot design right now, and I think the web makes available to a wide audience some styles that would otherwise never be seen. And the fact that thigh-high boots are this close to being acceptable as every-day footwear - it's more than this ardent boot-lover such as myself could ever have hoped for! I came across this image on a shoe-fixated blog, and they stopped me in my tracks: I just love everything about these, the color, that supertight fit (look how close it fits at the ankle!), and the shiny chrome element contrasting with the leather. Just pure boot artistry. I'm not sure if these were just a production sample, a runway only design or what. But could you imagine seeing these walking down the street? This is my fantasy of what 21st century footwear should be. If only we could be so lucky! The original blog site where I found the link is here: urbansocialite.com and the direct link to Andrew Magtenyi's site: andrewmajtenyi.com. I definitely hope to see more from this designer in the future.
For all you gear-heads and tool-queens out there, I'm posting some images of my newest toy/machine! It finally arrived, after what seems like an interminable wait. I have seriously been waiting over 6 months to get my hands on one of these. They kept selling out completely and didn't have any available. According to the vendor, they were bumped off the cargo boat twice by the likes of Wall-Mart. Next, they were delayed by bad weather. Then, the boat the shipment was on was selected to be inspected, which caused yet another delay. I was starting to feel like this thing was never going to get here, that I was somehow cursed, but finally here it is.
What is it you ask? Well, let me tell you: it's a sewing machine. "But Chris", you say, "you already HAVE a sewing machine!" But not one like this... It's a SPECIAL sewing machine. It lets you do special things. Like sew wings onto angels? No, but almost. Well, possibly. Anyway, it's called a "cylinder-bed" sewing machine. Here she is: Ta da!!!!
 Worth the wait, don't you think? My preeecious. See how there's a post sticking out from the right side of the machine? As opposed to a regular (also known as a flat-bed) sewing machine, this post or cylinder allows you to get into small areas and enclosed shapes, and stitch to your heart's content. The bobbin lives in a little case at the far end of the post. It's perfect for stitching closed-end shapes. So sleeves for straitjackets, look out. You are no match for this beast. Same goes for arm-pockets and leg-pockets for butterfly straitjackets and f-suits. Mu-hu ha ha haaa!
 See how the arm hangs over the edge of the table, so you can maneuver your workpiece any which way without obstruction? This beauty can also stitch quite thick leather and thread. So I can do collars, cuffs and harnesses on it as well.
These are things I COULD stitch before, maybe - but it was a pain in the ass. And now, I can do things that were pretty much impossible before. Like topstitching an arm-pocket connection, or doing that cool puffy hood I just blogged about. Here's the machine stitching the arm pocket to the body on a butterfly straitjacket:
See how the arm hangs over the edge of the table, so you can maneuver your workpiece any which way without obstruction? This beauty can also stitch quite thick leather and thread. So I can do collars, cuffs and harnesses on it as well.
These are things I COULD stitch before, maybe - but it was a pain in the ass. And now, I can do things that were pretty much impossible before. Like topstitching an arm-pocket connection, or doing that cool puffy hood I just blogged about. Here's the machine stitching the arm pocket to the body on a butterfly straitjacket:
 I could do this stitch before, but it was much harder to accomplish. I had to pull the pieces to get the to lay flat, and the potential problem is that it would pull the 2 pieces (which are held by just the clips) out of alignment. Now, the stitching can be done in a more natural position, with less stress on the parts, and that equates to smoother stitching, straighter lines, and perfect alignment between the parts.
Why do I do this? Because I care. Because I am trying to make the best pieces of custom bondage gear that I possibly can. Because I am obsessed, and this will help me get closer the the never-quite-reached goal of perfection.
Thank you for your support.
I could do this stitch before, but it was much harder to accomplish. I had to pull the pieces to get the to lay flat, and the potential problem is that it would pull the 2 pieces (which are held by just the clips) out of alignment. Now, the stitching can be done in a more natural position, with less stress on the parts, and that equates to smoother stitching, straighter lines, and perfect alignment between the parts.
Why do I do this? Because I care. Because I am trying to make the best pieces of custom bondage gear that I possibly can. Because I am obsessed, and this will help me get closer the the never-quite-reached goal of perfection.
Thank you for your support.
 This has been one hood I have wanted to make for a while now, but haven't been able to until I got a particular machine - namely a cylinder-bed sewing machine. This is the one sewing machine I have been waiting for, and whining for, for almost a year now, and it finally came in last week!! I put it to use right away making some items for an artist named Karen Hsiao - including this double-layer puffy hood.
  This is one of those things that I needed both the cylinder-bed machine, so I could sew inside the closed shape of the hood to create the quilted lines after the main seams of the hood were sewn shut, and the hood last - so I could stretch the 2 layers of soft lambskin leather, along with the foam inner layer, over the form - to take the shape of the head.
 This hood is basically 2 hoods, one nested inside the other. At the mouth and rear, they meet, but in all other aspects the outer hood is larger than the inner.
  Here are some views of the interior stitching. That cylinder-arm allows me to get inside that enclosed shape in a way that is just impossible with the flat-bed machine.
  I love the way this looks on the inside. I could see doing something reversible, or with thicker, puffier down or foam between the layers. This is just scratching the surface of the possiblilities.
 Once I got the size and shape of the hood last where I wanted it, and after sanding the shape smooth I wanted to test the size with a hood. As you can see from the pictures, it fit just perfectly, and I am really happy with the way it turned out.
  The sensory deprivation hood on the larger form is made of a pretty thick (and slightly spongy) leather, just the kind of hood I would want to place on the form to help shape and contour the leather to ensure a tight fit. The patent-leather hood on the smaller form is an example of another type of leather that would benefit from stretching over a wooden form to help fit a face contour better. Sure, they are a pain to make, but I will be able to make sculpted forms, casing and multi-layer hoods using these hood lasts as a foundation. Mu-hu ha ha (insert evil scientist laughter here!!) I can't wait!
 If you've read this blog for a while you may know that I am obsessed with a particular way of making hoods that depends on a wooden form to help create the curves needed to make a hood fit extremely well. This is especially useful when working with heavier, less stretchy leather, which may need some "encouragement" to stretch in certain areas in order to accommodate the chin for example. I got the idea from watching how shoes are made, typically over a last that helps shape the leather over the form of the foot. For many shoe-making procedures, it's indispensable.
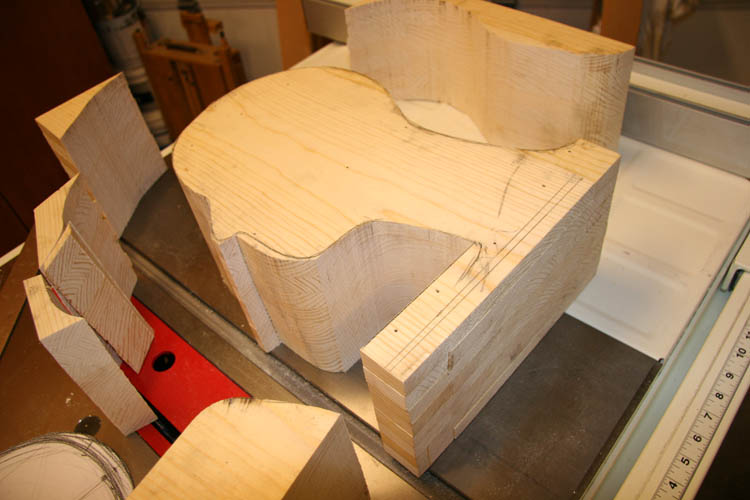
 I just finished carving my second head form, or hood last from wood a couple of weeks ago. It is sized to fit my extra-large head. At least I think my head is big - 24-inch diameter around the forehead at the brow line, and 28 inches from chin to crown. Let's just say I started with a pretty large block of wood.
 I used these cardboard strips cut to create loops of a certain size to check the progress as I went along carving the form. I knew that once the loops fit the form, it would be the correct size.
 Rather than trying to carve around the nose on the front of the face, I shaped the face first, then glued on a nose-piece after the fact. It made it a bit easier to shape the front of the head, as I didn't have to worry about being careful working around the nose. I could use coarse rasps and files to remove material more quickly.Placed beside the previous form, you can see it's a bit smoother and better proportioned all around. I definitely learn a lot every time I do one of these... It makes me appreciate the subtle shapes of the different planes of the face, particularly around the chin, and the jaw to neck transition. Next up, I'll do a medium-size. Then one with an open mouth (for gags)? Then make them all in a harder wood? It's never ending, I tell you!

 One thing that stood out to me was all the long leather gloves Audrey Hepburn wore throughout the movie. They were just beautiful, tight-fitting. And really long!
  I would recommend a watch if you are a fan of long gloves. Hopefully Netflix will upload a cleaner version of the movie in the future, as the sound and image on the one they stream is pretty darn crappy. But, even so, the gloves still shine!