Here's a quick peek at the work in progress on the hood for Serious Bondage. I am getting the basic shapes down for the hood and head harness that will go along with the male butterfly straitjacket I'm currently working on. Fortunately, I had a prototype hood that I could use a a base, onto which I applied tape to mimic straps. Once I'm happy with the look, I'll convert this into a pattern.
I have often thought about doing a hood that is also a harness - two pieces combined into one. I'm still not sure which direction I will go on this one: it may be a combination of hood and harness elements. But either way, the leather will be the same 2 colors used in the jacket - so it will have a matched look.
Here's a quick peek at the work in progress on the hood for Serious Bondage. I am getting the basic shapes down for the hood and head harness that will go along with the male butterfly straitjacket I'm currently working on. Fortunately, I had a prototype hood that I could use a a base, onto which I applied tape to mimic straps. Once I'm happy with the look, I'll convert this into a pattern.
I have often thought about doing a hood that is also a harness - two pieces combined into one. I'm still not sure which direction I will go on this one: it may be a combination of hood and harness elements. But either way, the leather will be the same 2 colors used in the jacket - so it will have a matched look.
 I'm really excited to get started on this project. It has been on the back burner for a few months now: a custom 2-tone male butterfly straitjacket for our friends over at SeriousBondage. I posted the sketches a while back, and was waiting to feedback before wanting to start on construction. As often happens, I had a bunch of other ideas for variations for the restraint, but ultimately Mark wanted to go with the original idea. Of course, he wants me to do the other ideas too, eventually. How cool is that? I can't wait to do them all... Let me just say that some amazing projects are coming down the pipeline in the next few months!
 The 2 leathers for this project are chosen for their color contrast. The gray color is actually pearlescent, and smooth - which will provide a great contrast with the dark brown, which is a bit heavier, with a waxy surface and a more distressed finish.
 I know black leather is a fetish classic, and I will always love it myself. But I have found myself wanting to experiment more with color lately, and do some more dramatic things with the designs. There are so many colors and textures that inspire the hell out of me every time I go to the leather supplier!
 Rough cut of all of my gray pieces:
 And the final trim.
 I'm tracing my pattern onto the back side of the brown hide...
 Here I have all the pieces cut out.
  Initial construction on the body:
 For the arm pockets on this armbinder, there will be lacing panels. This will allow the tightness to be adjusted. The shape of this arm pocket is a little different from the female versions I have done lately. It's a little more angular, (more male?) and will be a bit more restrictive. Suffer, slave!
 Here I'm showing the process for making the lacing opening. I start by using the pattern to transfer the shape of the opening to both sides.
  Then I glue and fold back the seam along the opening.
  I use the patten to mark the holes for the lacing grommets at this point.
  I punch out the holes and set the grommets. I'm using black size #0 osbourne grommets.
  Here we have the arm pockets half-assembled. I have already sewn in the panel behind the lacing opening.
  Using the pattern for the front and rear panels, I mark the location of the grommets for the side lacing panels.
 Now I've punched the holes and set the grommets in the side lacing panels.
 After setting the grommets, I sew in the backing behind the opening in the contrasting brown leather.
  Here you can see the body with the cowl attached.
  Arm sub-assembly complete. This looks so cool with the contrasting colors!
 And the pair, complete...
 Next I sew the front and back shoulder seam together, and set in the collar. I will have a turned edge on the collar, but will do that after setting the rear zipper.
  Here I have the arms laid out before attachment...
 ...and after! I wish it went that fast in real life!
  So, this actually brings me to a stopping point. I am ready to set the rear zipper, but unfortunately I don't have the zipper yet. Finding a real heavy-duty YKK #10 separating zipper is not as easy as you might think. I'm waiting for mine to arrive from New York...
 Until then, we have a good start - and I can begin working on the matching hood in the meantime. Tune in next time for that.
  Until then, take care and thanks for visiting!
 I just completed a custom f-suit, which always is a fun and challenging project. This is one I had made a prototype for a few months back, and awaited the feedback from the client in order to make sure the pattern was just right. We ended up making a number of edits and adjustments to the pattern.
  People often ask me what type of leather I use, as there are many kinds out there. For this project I use a hide that is usually stocked by my local vendor called Leon. It offers a nice combination of strength and softness, with a full uncorrected natural grain and a nice shiny surface (but not TOO shiny!). You can see from the tag that it's a 50 square-foot full hide, and this project will use just about the entire hide. (I hope to do a more detailed post on my suppliers in the future...)I'm not going to take you through every step on this, as I have already done a "how-to" post on the f-suit, but I will show a quick run through, and focus on one detail that sets this f-suit apart from others I have done: elbow and knee pads. Here are the cut-out pattern pieces for the front and back of the body:
 The arm pockets:
 And the leg pockets:
 For the elbow and knee pads I'm using a high-density foam pad, which you can find at Target or the local hardware store. The foam sold at the local fabric or craft store isn't nearly dense enough to create a comfortable pad. I am hoping this will provide a durable, effective solution.
 I'm cutting the shapes out with a surgical prep razor blade - these things are scary sharp, and longer than a standard razor. They go through the foam like cutting butter.
 I also cut triangular grooves out of the inside curve, to accomodate the bend at the elbow and knee.
  Here's a side view...
 The idea is to make it a bit easier for the pad to take the shape of the sharp bend in the elbow of the arm pocket.
  The pads will be covered in leather (of course!) and held in place with velcro patches.
  Here we have the finished elbow and knee pads.
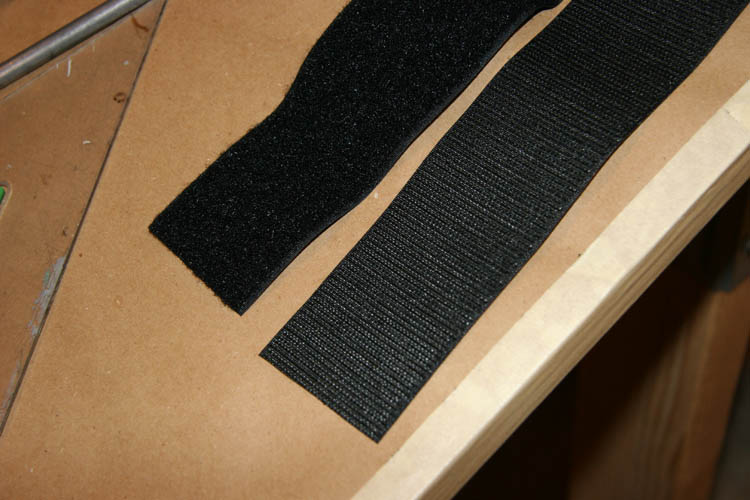
 I used 2 inch velcro, with the softer fuzzy side going into the suit.
  Arm pocket, sub assembly:
 Foot pockets, before zippers...
 ...and after:
 Zippers were also set into the front panel of this f-suit:
 Front panel sub assembly, complete!
 Here I'm ready to sew front and back together.
 Here we skipped ahead a few steps: Zipper has been set, tongue sewn in. Arms ready to be attached...
 And arms complete.
  Add the legs, and our f-suit is complete! Here's the back...
 And the front...
 That's all for now, folks... Another one for the history books. Thanks for following along!