
 I'll begin by placing the front panel pattern on the hide, and since this is the most visible part of the sleepsack, I will try and place it on the best-looking part of the leather. I also want to cut the left and right halves close together so the grain of the leather matches across the front. I try to use something heavy to hold down the large pattern pieces as I trace (in this case I'm using boxes of screws).
  Once I have the front panels laid out, it's time to place the rear panels. If I had a large enough hide, I could possibly cut these in one piece as well. But because I am working with a half-hide (about 28 square feet) I will need to split the rear panels into 2 parts to make them fit. I try to make the seam in a place that will look good aesthetically, and that will maximize the use of the leather.
  I cut the pattern and mark the seam for future reference.
  Here are the 4 panels for the rear laid out on the hide:
 Once I am happy with the layout and have all the pieces traced, it's time to cut them out. Here are the front panels, internal sleeves, foot pocket sides and bottom, collar and shoulders:
 A quick word about equipment. I hope to discuss tools more in future posts, but for now I just wanted to bring up scissors. Leather is pretty tough to cut, and most normal scissors aren't up to the task. I use these heavy shears from Wiss. They are not cheap, but are worth every penny. They slice through thick leather easily, and cut all the way to the tip.
  I keep another pair of scissors around to cut paper for patterns and a shorter pair for snipping threads, and the Wiss only cuts leather. Cutting paper can really dull the blade, so I never do it!
  Here we have the rear panel pieces laid out, and now we're ready to start sewing.
  My pattern has indications for darts at the top of the rear panel and the shoulders. These help create the contoured shape to fit the shoulder closely.
 I use bulldog clips to hold the piece in place for sewing. It's a good idea to make your darts symmetrical, as you can only see one side when you are sewing. If the shapes were different it would be difficult to get them to line up.
 I usually start near the point of the dart and backstitch to the tip, then proceed with the stitching to the open end of the dart. Remember to stop at your seam allowance line.
  Here I have the top and bottom halves of the rear panels clipped and ready for sewing.
  Here are the shoulders after sewing:
 And the dart at the top of the rear panel:
 And finally our top and bottom rear panels sewn together.
  Time to break out the glue and brush...
 Glue the darts...
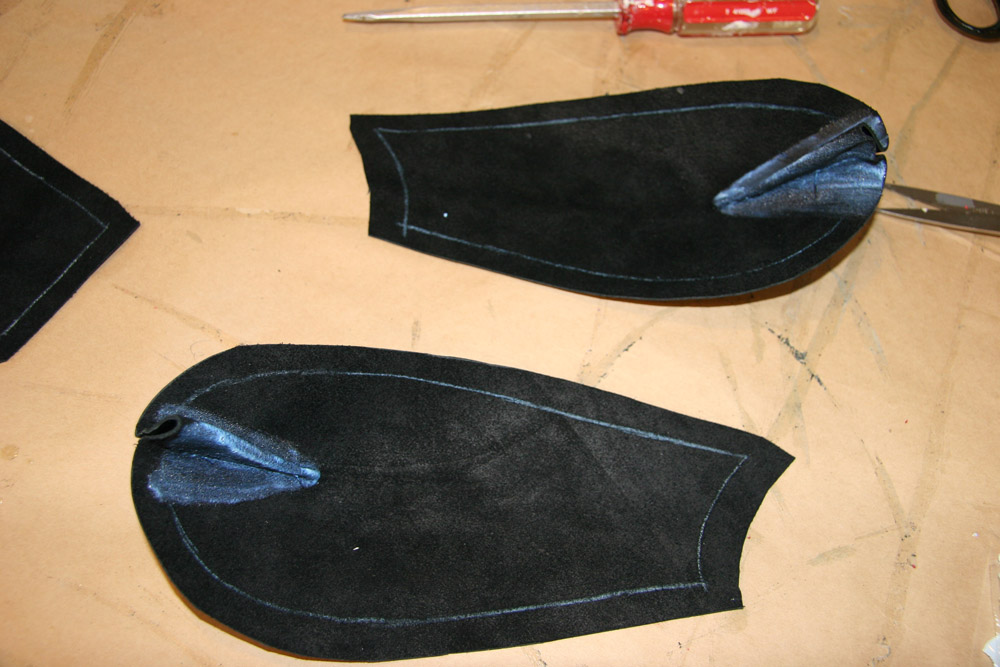
 ...and the seam allowances.
  Allow the glue to set up, then trim and flatten gently with the mallet.
  Here's a look at the finished side of our shoulder.
  The inside of the top panel dart, trimmed and pounded flat.
And the top and bottom rear panel seams finished and flattened.
 Next up, we have the first sewing operation on the front panels. Since this sleepsack will be rear entry, the front will be a closed seam.
  I use the bulldog clips to hold the pieces together while sewing.
 Once sewn, the seam is glued...
 ...and flattened with the mallet.
 Here's a closeup of the front seam from the outside, before topstitching...
 ...and after. This leather is really beautiful!
 Now we'll connect the rear panels to the front panel. I align the pieces at the shoulder and use pretty much every bulldog clip I own to hold the pieces in place for sewing.
  Now that we have the panels sewn together, it's time for some major gluing of the seams.
  This part takes forever!
 Once again, wait for the glue to set up, then fold and pound the seams flat. It is definitely a tedious process on a sleepsack, as you have a lot of long running seams.
This concludes part 1 of our sleepsack project. Tune in next time when I'll cover the shoulder and foot pocket construction - until then, take care...
-Christopher

Hello Chris,
ReplyDeleteI am wondering if you have any pattern sleepsack like this:)
If so, i would like to try and make it by my own.
Regards