Friday, April 23, 2010

Making a Hood Step-by-Step Part 2

For the next step on our hood project we'll use bulldog clips to hold the pieces together while sewing. You can't use needles as you would if you were sewing cloth, as it would leave holes behind. Plus, it would be tough to punch through the leather with the needle. You can also use clothespins or paper clips to hold parts together... or sometimes masking tape.

This image shows the front and rear right panels and front and rear left panels clipped and ready for sewing:


Sew along the line, removing clips as you go.

The finished seam:


Now it's time to break out the glue. In most leather projects, you'll be gluing down your seam allowances after sewing to flatten them out. I use contact cement that is available at your local home improvement center.

I also use these little disposable brushes from the woodworking supply store. They are really handy, as the contact cement is impossible to wash out of the brush. Once it sets up, you can kiss your brush good-bye. These come in packs of 50 to 100, do a good job of spreading the glue and getting it where you want it, and are relatively inexpensive.

The glue goes on a milky white color, and you should apply to both sides of whatever you want to join. You wait a few minutes until it clears, then press the 2 sides together.


See how it changes and becomes more transluscent? Now you're ready to go.

I press the seam down with my hands first, then hammer with a rawhide mallet to flatten the seam.

Use scissors to trim the seam allowance where it will meet another seam.

Voila! That's the flattened seam for the first side...

...and here's what the other side looks like:

Now I place the inner ear pads in position using the guidelines from the pattern. I traced the outline of the pieces to create a guide for the glue.

I glue around the outline and on the inside of the ear covers.

Place the foam inserts, place the covers and press into place.

Next I sew along the lines on the sewing machine to secure the ear pads to the hood.


Here's the view from the outside:

Repeat for the other side, and that step is complete!

Making a Hood Step-by-Step Part 1

I had a chance to get back to my leather working projects yesterday after being distracted by a couple of projects around the house... You ever have a project that you don't think is going to take too long, and before you know it you've spent every waking moment for four weeks and hundreds of dollars to finish? It was one of those projects!
Anyway, for this hood project, I wanted to share my methods and techniques with you so I shot pictures as I went along detailing the process.
It all starts out with a design drawing which shows all the elements of the project. In this case, it was to be a hood with a focus on sensory deprivation. This is for the same client for whom I made the sleepsack a few weeks ago in purple leather. Fortunately I had enough leather left over to create the hood. The design incorporates foam padding over the ears to help muffle outside sound. It closes with a laced-up rear and is to include a D-ring at the top.

Once the design is finalized you have to make a pattern. I have stock patterns I have developed over the years which I use a a base for the design, plugging in the client's measurements. Each pattern becomes unique and will (hopefully) turn out to be a perfect fit. I usually can get close with three measurements: around the forehead, chin to crown, and neck. You can see these 3 lines sketched onto the pattern below:

The next step is to cut out the pattern...

...and place it onto the leather.

I use a light Berol Prismacolor colored pencil to transfer the pattern onto dark leathers.

Rough cut the shapes...

...then finish cut, so the seam allowance is even all around. Leather is expensive raw material, so you often have to crowd pieces together which may leave you with variable amounts of seam allowance, but for sewing curves especially, it helps to have the seam allowance as even and consistent as possible. It definitely gives you a more professional look.

The next step on this project was to create a pattern for the earpad covers inside. I also marked how far down the pads should be from the top seam. Normally I would create the front and rear of a hood first, joining them together with the side seam. Because of these earpads, I had to sub assemble the sides first.

The leather ear covers, cut out...

...the foam inserts...

...and the roll of foam they came from (available at craft and fabric stores).

Tune in next time to see more progress on this project!

Friday, April 9, 2010

Revised F-suit hood design


I am currently working with a client on a design for a custom f-suit with attached hood, and we have exchanged sketches detailing the specifics of the hood. It will be an open-faced hood, but with detatchable blindfold and mouth cover. I showed the initial sketch in a previous post, and the client (who I must say is full of really good and creative ideas) sent back a revised sketch which offered a much better solution to the design problem. Instead of traveling straight back from the mouth cover to the back of the hood, the top strap is angled up to provide a bit of upward tension. The blindfold strap now angles in a more downward direction to connect with a buckle placed between the two mouth cover straps.

It's very cool looking, and I think it is going to look great on the finished piece. This is definitely a situation where working with someone else can take the design into an enexpected direction - resulting in a better, more artistic solution.

Thursday, April 1, 2010

Fetish Inspiration - eGarbs


About 15 years ago I came across a company that manufactured truly creative and beautiful bondage suits - eGarbs. I think the first time I saw their work it was shown in a full-page ad in Skin Two Magazine. Based in the UK, I got the sense that they were a creative collective that often showed their works at the Torture Garden fetish parties. I was always blown away be the detail and craftsmanship in their work, and of course the designs were unlike anything I had ever seen before.

I don't have much specific information about the company or their process, but I know some pieces they created were in collaboration with an architect.

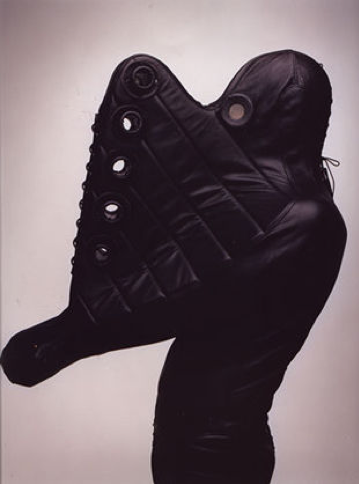
The "Betty" suit, shown in red above was a piece that made a particularly deep impression. The padding details, the way the fists are held in a balled-up position and the laced closure, the way the garment holds the wearer in a specific posture, and transforms them into a beautiful, helpless, otherworldly and exotic creature. It's still probably the most unique and artful piece of bondage gear I've ever seen.

Monday, March 29, 2010

Fetish Inspiration - Antony Gormley


The artist Antony Gormley is probably one of the best known artists in Great Britain. He's the author of highly visible pieces, and just completed the "one and other" performance piece in Trafalgar Square where different people took turns standing on a plinth - one hour each for 100 days. That piece was amusing at best to me, but the work he does that I like the most is his sculpture. He uses his own figure for the basis of his work, and is often mummified and wrapped in plaster in order to create a foundation for the sculptures. I found an interview once where he even admitted the inherent kinkiness in the process, which I thought was really refreshing. Maybe the Brits are a bit more open minded about such things.

He often leaves the joints where the metal pieces in his work come together exposed, which make me think of pattern pieces for leather craft. I would really love to do a sleepsack that mimics the look of one of his pieces.

The F-suit step by step


I have been comissioned recently to make a custom f-suit, and hope to share with you the process step-by-step.
When someone contacts me, the initial discussion focuses on the client's wants and needs, and usually I make sketches and design drawings to spell out all the elements of the design. The sketches help make sure all parts of the design are figured out before the materials are purchased, and helps come up with an accurate estimate of the cost. I'm showing sketches of the hood detail for this project, as it is elaborate and includes an open-face hood with detatchable blindfold and mouth cover.

Wednesday, March 24, 2010

ladies straitjacket - in use!


I wanted to share some images of the ladies straitjacket I recently made in use, shown here courtesy of our friends over at straitjacketed.com. These incredible pics of this custom piece were just sent over today. All I could say when I saw the images is "WOW!" And I think I threw a couple of OMG, OMGs in there as well. I was just stunned at how great it looks on the model, how beautiful she looks in the jacket. I would call the project a complete success. What do you think? The hand pockets, the tapered sleeves with zips at the wrist for a tight fit, the tailored fit of the front panel around the breasts. I am so happy with the finished design. Thanks again to straitjacketed.com for letting me post the images. Hopefully there are more collaborations in our future!