
 We start out with a patent pig hide. Patent leather can be from a cow as well, but it's much heavier, and doesn't stretch much - so I prefer to use the pig for patent leather hoods. Also, because these hoods are to be used for photo shoots, it is important that they fit skin-tight. These hoods will almost take on the look of rubber, they are so shiny... they should look fantastic.
  Here are our pattern pieces, including the new 2-piece tongue, the rear panel (which is the same on both hoods), the open-mouth and open-face front panels.
  It's kinda' hard to see, but here's the pattern traced out on the back side.
  And all the parts cut out.
  The first sewing we'll do is on the front-halves, and the tops of the rear panels.
  I've loaded up the red thread to keep the stitching tone-on-tone.
  I wanted to share with you a little tip that has helped me out. Even though my machine can backstitch, I find it hard to control sometimes, especially when sewing on a curved seam because it can be hard to see where you are placing your stitch when sewing towards yourself. So instead, I start my backstitch by flipping the workpiece around first.
  Like so:
  Now I can backstitch towards the end of my seam (just 6-8 stitches) with a clear view, and move the workpiece away from me.
  Once I get to the end of the stitch I swing the workpiece around (180º)... You'll need to lift the presser-foot and use the needle as a pivot.
 ...and now proceed with the stitching along my outline. If you are wondering why the backstitch is necessary, it traps the thread to keep it from unraveling. Even with a reverse-feed, I find this method sometimes makes getting perfect alignment easier.
  When I get to the end of the line, I do the same thing: flip the workpiece 180º, and "backstitch" going forward. I have been using this one trick a lot lately.
  Now our fronts and top rear seams are sewn, it's time to clip out the seam allowance and glue and fold those seams flat.
  Remember, you just snip little V-shaped pieces for outer curves, and straight line snips for inside curves.
  I end up doing lots of cuts at the mouth to ensure a smooth shape for the mouth opening.
  Once the snips are cut, apply glue and wait for it to set up.
  Also, time to glue the tops of the rear panels, along with the edge along what will become the rear opening.
  On the open-face hood, the opening seam is glued and folded down.
  Same for the mouth-only hood.
  It can be tricky to deal with this relatively thin leather. It wants to curl up, and generally misbehave.
  Once the rear seams are folded over we can topstitch along the edge.
  The open mouth and open-face edges and front-seams can all be topstitched as well.
  Our next step is to set the tongue in the back panel.
  I am starting to like this new 2-piece tongue instead of a larger one-piece that I used to use. This is easier to sew, allows for the hood to open wider, and uses less material, and therefore creates less bulk at the rear of the hood. The mini-tongue keeps the hair from being pulled through the lacing holes, and the larger tongue covers the rest of the rear opening when the hood is laced on.
  The first step is to set the mini-tongue in place.
  You can see the shape has been contoured to fit the rear panel precisely.
 I use a couple of pieces of tape to secure it.
  Next, the larger main tongue, which is shaped with a notch at the top.
  The idea is to have the notch align with the center-seam.
  This shape is also contoured to follow the edge of the rear of the hood. Both pieces have enough overlap to make room for the lacing grommets between the edge of the stitching and the rear opening.
 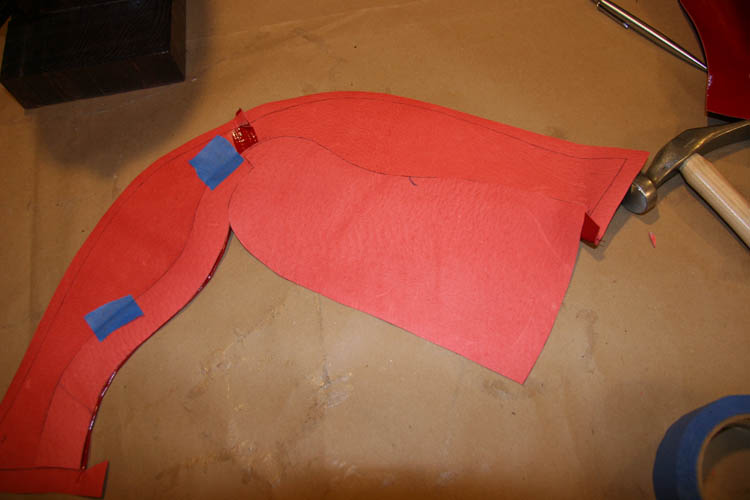 With the second tongue taped down, we're ready to sew.
  Into the machine for a careful topstitch - following along the first row of stitching, but leaving room for the grommets to come later - right around a half an inch.
  And there we have it, topstitch complete.
  Now we can remove the tape, and trim the excess leather from the seam we just completed.
 Now we're ready to join the front and rear halves together. Align them on the center seam at the top of the hood...
  ...and use binder-clips to hold the pieces together for sewing.
  Back to the sewing machine for stitching.
  Looking good...
  Next up, time to trim the seam allowances as before,

then glue...
 and fold-down the side seams.

 This is where the ability to open that rear panel wide comes in handy. It makes the topstitching of the side seams much easier, as the hood can be laid flat on the flatbed machine for stitching.
  Now that is done...
 At this stage, we're ready to close off the bottom edge. Because leather can stretch as you are sewing it, you may have to fine-tune the pattern line along the bottom edge so your pieces line up correctly, and you have a symmetrical, even finished result.
  I just draw a new line if necessary, and trim the new seam allowance making sure everything is even.
  Then, it's just glue & fold, and we're ready to sew.
 This leather is so thin, I am sewing very close to the edge and using a finer stitch length than I would with a heavier leather.
  Now with out bottom seams closed up, we're done with the sewing.
  Only the grommets are left. I mark out the position with a sharpie and the tape measure. These were spaced 1.125" apart.
  Punch the holes...
  ...and set the grommets.
  Our 2 hoods are complete! I lace them each on to the hood form overnight, just to break them in a bit, and help them take on the contour of the head.
  These are going to the artist Karen Hsiao to work with, so I'm looking forward to seeing what she does with them...
 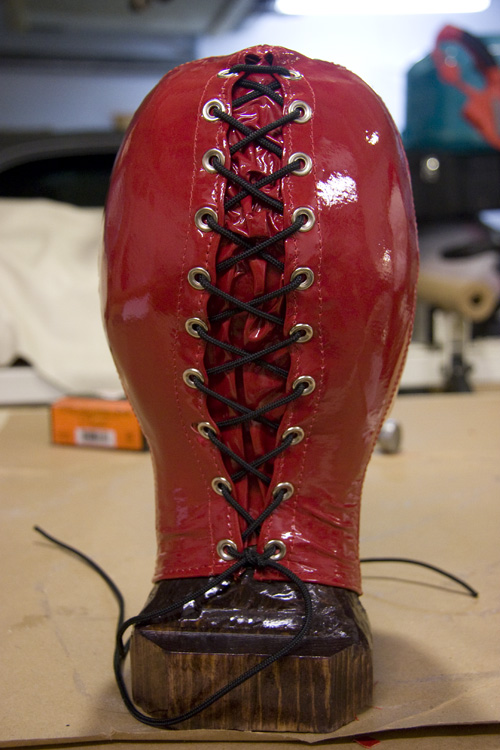 She has been shooting this past week with these hoods and several other pieces I made for her. If possible, I hope to share images when they are available.
  For those of you that are interested, I will be posting the patterns for the new 2-piece tongue and the open-faced hood variation shortly, so stay tuned... And thanks for visiting!
I am really inspired to get behind my sewing machine again!
ReplyDeleteOh man, thanks for the tip on back stitching. Mine always end up veering away from the straight line. Why didn't I think of that? :P
ReplyDeleteYou know, sometimes I have to slap myself on the forehead when I come across a solution that has been right there all the time. My purpose in life is to share these "Doh" moments! =0)
DeleteWhen I saw this project I thought of the villain from Farscape, Scorpius:
ReplyDeletehttp://www.youtube.com/watch?v=HiANybTAFR0
The costume is too awesome to describe. You have to see it to appreciate it. My two cents...
Good work as always Christopher.
That is too funny. It's like the sexy catwoman mask, only on an old, decrepit, scary, evil dude! Thanks for images that will inhabit my nightmares...
Delete