This project is the first step towards making a sleepsack with an integrated high-heel pocket. I'm going to try making a foot pocket that will tightly conform to (and completely restrict, I hope) a pair of killer high-heeled boots. It will be built into a sleepsack (eventually) that will also have the arms in a behind-the-back monoglove position.
I was partly inspired to try this after seeing the image below from Eric Stanton's "Pleasure Bound" years ago. It's going to be one seriously cool (and restrictive) sleepsack!
I start with plastic wrap, then cover it with a couple of layers of duct tape. I start making decisions about how I want the shape to be as I make the wrap. For example, I liked the way there was some separation between the toes creating a kind of curve in the front. It seemed better than just making it go straight across.
The rear was another place where there could be different ways to approach the design. I decided to go with the heels pretty close together, and since they're pencil thin it really restricts the type of boots that can be worn inside the restraint. I guess I'm okay with that, because after all - the more extreme the better, right?
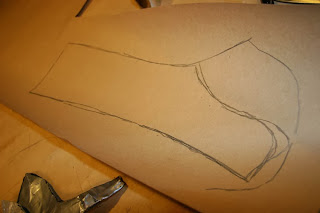
You can see the pattern has been cut into 4 pieces, following along the guidelines I drew with a sharpie. I do my best to keep the sections roughly the same size, although they can be evened out a bit during a later step. I try to cut along natural break points in the pattern - places where the curve or shape just can't be made with one flat piece of leather. The bottom of the boot pocket and heel (shown below) can actually be one piece, similar to how it would be on an actual shoe.
I start off tracing one side onto butcher paper. I made some marks indicating the direction of stretching that will help the boot pocket take the correct shape. This will help me place the pattern on the leather in the correct orientation as well...
Now the second side is traced over the first, resulting in two sets of lines.
I usually average out the difference between the lines to get the final pattern shape. If one pattern is a bit too big, and the other is a bit too small, a line between the two should be just about right.
For the front of the boot binder, I started off trying to make it all from one piece.
But after taking into account how curved the lower front part of the boot binder was, I decided at this point to make the front panel in two separate pieces, one for the shaft, and one for the side and toe.
Here you can see the final line for the front panel of the boot binder pocket.
The toe sections (including what on a shoe would be the upper):
Transferred to the butcher paper, they look like this:
And the bottom of the binder forming the sole and inside of the heel pocket:
All the parts get labelled and cut out.
Time to transfer to leather for the prototype. On something like this, I'm not so worried about orientation: this is just making the most of a piece of scrap leather. On a finished piece, all the pieces would have to have the grain running in the same direction.
Parts are all cut out with an approximately 3/8-inch seam allowance.
Toes are clipped and sewn to the front panels.
Rear seam clipped for sewing:
Rear seam gets flattened and glued down:
Toe and upper seams get glued down...
Front seam is glued down, to make it ready for the zipper.
Zipper gets sewn into place, first one side...
...then the other:
I put a couple of stitches in with heavy waxed thread to make a zipper stop.
Side seams clipped for sewing.
Side seams get glued down...
Bottom of foot pocket is clipped and sewn in.
And those seams get glued and flattened.
Turn the workpiece right-side out...
And prototype complete!
Came out pretty cool...
Can't wait for the test-fitting!


Looks very good. :)
ReplyDeleteThanks, Maskenfreund! I just did a test fit photo shoot, and they look even better on... Will post shortly.
Deleteso clear .
ReplyDelete