
So we started discussing ideas and concepts for future collaborations. But I wanted to make some more basic things for her to shoot right away, including a butterfly straitjacket in red leather. I had this great hide, rich and dark, which I thought would be perfect for her to shoot.
Also, this was the first project on which I was able to use my new cylinder-bed sewing machine. Woo-hoo!
So we start off with all the pattern pieces cut out:

I mark the fronts of the arm-pocket sides.
 Also, I mark the front and back panels for the arm pockets.
  These get clipped together for sewing.
  I also clip up the body pieces, front to back at the top and sides.
  Those get sewn together.
 Now I clip the back panels to the sides on the arm pockets, and those are sewn.
  Now it's time for our first glue operation. But first I clip into the seam allowance to reduce bulk where the allowance lays flat.
  On the front and back arm pocket panels, darts are snipped in so the seam allowance lays flat.
 The sharper the curve, the wider the little "V" you cut out should be.
  But, never cut all the way to the seam itself. You don't want to weaken the seam. I usually stop at least 1/8-inch short.
  Once the little cuts have been made, time to glue the seams down. I used my little drying rig so I could have all the seams coated with glue at one time.
  Same idea with the body: both sides can be glued and drying at once.
  Once the glue is ready, the seams are pressed flat, and pounded gently with the mallet.
 At the ends of the glued-down seam allowances, we have these little tails.
 Remember, in order to not create a gap you can see through, trim only one side of the tail:
 Then flip the other tail over:
 This reduces the bulk at the seam, but won't create a gap at the intersection of the panels. Next, I clip the arm pocket in place inside the body.
  Make sure you have the side you want facing out oriented correctly. It's easy to get mixed up at this stage.
  Now, onto the cylinder-bed machine to attach the arm pocket. Here is where this machine excels. See how the arm-hole just slides over the cylinder arm?
  Easy, peasy!
 Have you ever wanted to kiss a machine? I have.
 Here's the stitch after the fact. Now we have the arms in place.
  Next, we'll join the 2 halves together at the front seam.
 Once sewn, those seams all get the glue-and-flatten treatment.
  The trickiest part of this is getting the glue neatly onto the inside seam.
 Once those seams are glued down, here is the result:
 Nice connection at the arm pocket.
  That front seam looks great as well.
 Next, it's time to attach the collar. Align on the center mark.
  Use copious numbers of clips to hold it in place, and sew.
  Since it's so cold in the workshop, I have to rig a hair-dryer to warm the glue.
  At this point I want to glue down all the open seams at the collar and down the back of the jacket.
  Only the collar and lower hem don't get glued, as they will both have a rolled-edge finish.

 At this point I trim the collar to make sure the left and right heights match.
  Then these little collar tabs are glued and folded down.
 Now we move to the lower edge of the jacket. I cut a strip to create the rolled edge. The strip is clipped in place, good-side against good-side, aligned with the bottom, and sewn about 1/8-inch from the edge.
  There should be a little overlap on either side when you are done.
  You will need that little extra to create a tab to tuck in.
  First, clip out leather from the stitch line to the edge of the jacket. Leave a little tab the size of your rolled edge.
  The rolled edge folds down.
 The little tab gets tucked around.
  See him hiding on the other side?
 Finally, the rolled edge comes up the backside, and traps the little tab in place.
  Let's do that again, but with glue this time...
 Here we are all glued up:
 And fold, tuck and roll - voila! A rolled-edge seam.
 Now you just topstitch to keep it all in place.
  All done now, except for the collar.
  This is the same treatment as the bottom edge. Clip the strip with a bit of overlap.
 Sew along the edge of the seam.
 Trim the tabs, glue, fold, tuck and roll.
  Pretty as a picture.
  Now that is starting to look like a jacket.
  Now, time for some closure. In this case, a YKK Separating Zipper. I like to use masking tape to hold the zip in place during sewing.
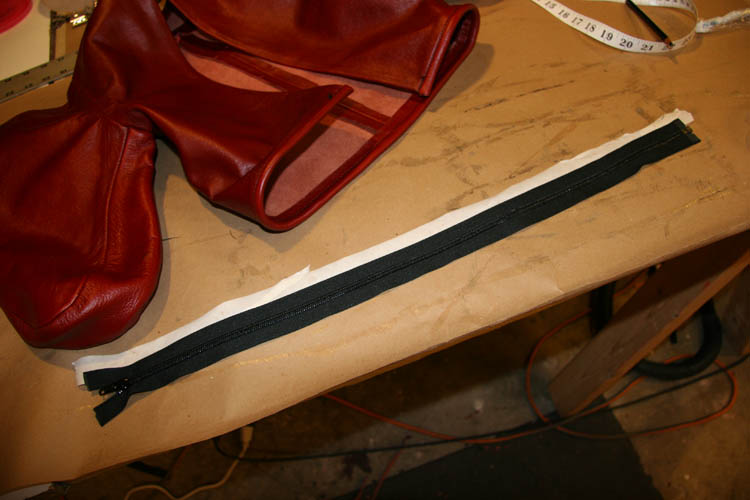

 Once the first side is sewn, I use tape to hold the other side so it is aligned perfectly.
  Once I'm happy with the position, the zipper can be opened for sewing.
  Here's with the 2nd side of the zipper sewn in.
  Finally, last but not least, it's time for the tongue. I cut a strip about 19 inches long and about 2-1/2 inches wide.
  This also gets the "tape in place" with the old masking tape.
  And then the tongue is top-stitched into position.
  And now we are done! Strip away the tape, trim a few loose threads, this one is complete.
  The leather is just so pretty on this one. I am really happy with the way it turned out.
  Until next time...
i'm glad you're posting again! i love to see these step by step how-tos, even if i'll never be able to make one myself.
ReplyDelete:)
Absolutly fantastic... watch my avatar... :P
ReplyDeleteThanks, sammy! I'm definitely back to more regular posting. I miss your blog! You have to let me know if you start it up again.
ReplyDeleteDani, thanks darling. I LOVE your avatar image!!! Very hot my dear...
ReplyDeletei did start it back up, but i feel bad advertising it for some reason. it's also not as interesting as the old one, because i'm not posting very often, and i've also been dealing with brain stuff recently, and posting that crap there too.
ReplyDeleteanyway, it's here: http://sammytriesagain.blogspot.com/
and i'm hoping to get more fun stuff on it in the new year. :)
Shit, sammy - I didn't know about the stuff you've been going through! I'm sorry to hear about that. Please know you can contact me if you ever want to talk, or if you need anything. I really hope you are feeling better...
ReplyDeleteChristopher...
ReplyDeleteI am very new to your blog, but it has fully captured my attention. Your work is beyond good. I would like to find out if it's possible to contract you for a few things, or if you're willing to share more information for making them. Please get in touch, if you're willing, and have a great holiday!
-A
Christopher, I am very pleased to read and see your works. All the notes and photos are very useful for when I am sewing my own leather clothes. I have been sewing in leather for many years and recently find your page and I think we have same interest of leather.
ReplyDeleteYes, I can see you butterflyjacket with a attached hood. Please do that version..
Have a nice day
Soren